Das Aufbewahren von Backups Ihrer Datenbank ist eine der wichtigsten Aufgaben in jeder Produktionsumgebung. Es ist der Prozess, Ihre Daten an einen anderen Ort zu kopieren, um sie sicher aufzubewahren. Dies kann bei der Wiederherstellung nach Notsituationen wie Datenbankbeschädigung oder einem irreparabel abstürzenden Datenbank nützlich sein.
Abgesehen von der Wiederherstellung kann ein Backup auch verwendet werden, um eine Produktionsdatenbank nachzuahmen, um eine Anwendung in einer anderen Umgebung zu testen, oder sogar um etwas zu debuggen, was in der Produktionsdatenbank nicht möglich ist.
Es gibt verschiedene Methoden der Datenbanksicherung, die Sie implementieren können, von der logischen Sicherung mit in die Datenbank eingebetteten Tools (z. B. mysqldump, mongodump, pg_dump) bis zur physischen Sicherung mit Tools von Drittanbietern (z. xtrabackup, barman, pgbackrest, mongodb konsistentes Backup).
Welche Methode zu verwenden ist, hängt oft davon ab, wie Sie wiederherstellen möchten. Angenommen, Sie haben versehentlich eine Tabelle oder eine Sammlung gelöscht. So unwahrscheinlich es scheinen mag, es kommt vor. Der schnellste Weg zur Wiederherstellung wäre also, nur diese Tabelle oder Sammlung wiederherzustellen, anstatt eine ganze Datenbank wiederherstellen zu müssen.
Sichern und Wiederherstellen in Mongodb
Mongodump und mongorestore sind die Tools für logische Backups, die in MongoDB verwendet werden, es ist eine Art mysqldump in MySQL oder pg_dump in PostgreSQL. Die Dienstprogramme mongodump und mongorestore werden bei der Installation von MongoDB mitgeliefert und sichern die Daten im BSON-Format. Mongodump wird verwendet, um die Datenbank logisch in Dump-Dateien zu sichern, während mongorestore für den Wiederherstellungsvorgang verwendet wird.
mongodump- und mongorestore-Befehle sind einfach zu verwenden, obwohl es viele Optionen gibt.
Wie wir unten sehen können, können Sie bestimmte Datenbanken oder Sammlungen sichern. Sie können sogar einen Schnappschuss zu einem bestimmten Zeitpunkt erstellen, indem Sie das Oplog einschließen.
example@sqldat.com:~# mongodump --help

Usage:

  mongodump <options>


Export the content of a running server into .bson files.


Specify a database with -d and a collection with -c to only dump that database or collection.


See https://docs.mongodb.org/manual/reference/program/mongodump/ for more information.


general options:

      --help                                                print usage

      --version                                             print the tool version and exit


verbosity options:

  -v, --verbose=<level>                                     more detailed log output (include multiple times for more verbosity, e.g. -vvvvv, or specify a numeric value, e.g. --verbose=N)

      --quiet                                               hide all log output


connection options:

  -h, --host=<hostname>                                     mongodb host to connect to (setname/host1,host2 for replica sets)

      --port=<port>                                         server port (can also use --host hostname:port)


kerberos options:

      --gssapiServiceName=<service-name>                    service name to use when authenticating using GSSAPI/Kerberos ('mongodb' by default)

      --gssapiHostName=<host-name>                          hostname to use when authenticating using GSSAPI/Kerberos (remote server's address by default)


ssl options:

      --ssl                                                 connect to a mongod or mongos that has ssl enabled

      --sslCAFile=<filename>                                the .pem file containing the root certificate chain from the certificate authority

      --sslPEMKeyFile=<filename>                            the .pem file containing the certificate and key

      --sslPEMKeyPassword=<password>                        the password to decrypt the sslPEMKeyFile, if necessary

      --sslCRLFile=<filename>                               the .pem file containing the certificate revocation list

      --sslAllowInvalidCertificates                         bypass the validation for server certificates

      --sslAllowInvalidHostnames                            bypass the validation for server name

      --sslFIPSMode                                         use FIPS mode of the installed openssl library


authentication options:

  -u, --username=<username>                                 username for authentication

  -p, --password=<password>                                 password for authentication

      --authenticationDatabase=<database-name>              database that holds the user's credentials

      --authenticationMechanism=<mechanism>                 authentication mechanism to use


namespace options:

  -d, --db=<database-name>                                  database to use

  -c, --collection=<collection-name>                        collection to use


uri options:

      --uri=mongodb-uri                                     mongodb uri connection string


query options:

  -q, --query=                                              query filter, as a JSON string, e.g., '{x:{$gt:1}}'

      --queryFile=                                          path to a file containing a query filter (JSON)

      --readPreference=<string>|<json>                      specify either a preference name or a preference json object

      --forceTableScan                                      force a table scan


output options:

  -o, --out=<directory-path>                                output directory, or '-' for stdout (defaults to 'dump')

      --gzip                                                compress archive our collection output with Gzip

      --repair                                              try to recover documents from damaged data files (not supported by all storage engines)

      --oplog                                               use oplog for taking a point-in-time snapshot

      --archive=<file-path>                                 dump as an archive to the specified path. If flag is specified without a value, archive is written to stdout

      --dumpDbUsersAndRoles                                 dump user and role definitions for the specified database

      --excludeCollection=<collection-name>                 collection to exclude from the dump (may be specified multiple times to exclude additional collections)

      --excludeCollectionsWithPrefix=<collection-prefix>    exclude all collections from the dump that have the given prefix (may be specified multiple times to exclude additional prefixes)

  -j, --numParallelCollections=                             number of collections to dump in parallel (4 by default) (default: 4)

      --viewsAsCollections                                  dump views as normal collections with their produced data, omitting standard collections
Es gibt viele Optionen im mongorestore-Befehl, die obligatorische Option bezieht sich auf Verbindungsoptionen wie Host, Port und Authentifizierung. Es gibt andere Parameter, wie -j zum parallelen Wiederherstellen von Sammlungen, -c oder --collection für eine bestimmte Sammlung und -d oder --db zum Definieren einer bestimmten Datenbank. Die Liste der Optionen des mongorestore-Parameters kann mithilfe von help angezeigt werden:
example@sqldat.com:~# mongorestore --help

Usage:

  mongorestore <options> <directory or file to restore>


Restore backups generated with mongodump to a running server.


Specify a database with -d to restore a single database from the target directory,

or use -d and -c to restore a single collection from a single .bson file.


See https://docs.mongodb.org/manual/reference/program/mongorestore/ for more information.


general options:

      --help                                                print usage

      --version                                             print the tool version and exit


verbosity options:

  -v, --verbose=<level>                                     more detailed log output (include multiple times for more verbosity, e.g. -vvvvv, or specify a numeric value, e.g. --verbose=N)

      --quiet                                               hide all log output


connection options:

  -h, --host=<hostname>                                     mongodb host to connect to (setname/host1,host2 for replica sets)

      --port=<port>                                         server port (can also use --host hostname:port)


kerberos options:

      --gssapiServiceName=<service-name>                    service name to use when authenticating using GSSAPI/Kerberos ('mongodb' by default)

      --gssapiHostName=<host-name>                          hostname to use when authenticating using GSSAPI/Kerberos (remote server's address by default)


ssl options:

      --ssl                                                 connect to a mongod or mongos that has ssl enabled

      --sslCAFile=<filename>                                the .pem file containing the root certificate chain from the certificate authority

      --sslPEMKeyFile=<filename>                            the .pem file containing the certificate and key

      --sslPEMKeyPassword=<password>                        the password to decrypt the sslPEMKeyFile, if necessary

      --sslCRLFile=<filename>                               the .pem file containing the certificate revocation list

      --sslAllowInvalidCertificates                         bypass the validation for server certificates

      --sslAllowInvalidHostnames                            bypass the validation for server name

      --sslFIPSMode                                         use FIPS mode of the installed openssl library


authentication options:

  -u, --username=<username>                                 username for authentication

  -p, --password=<password>                                 password for authentication

      --authenticationDatabase=<database-name>              database that holds the user's credentials

      --authenticationMechanism=<mechanism>                 authentication mechanism to use


uri options:

      --uri=mongodb-uri                                     mongodb uri connection string


namespace options:

  -d, --db=<database-name>                                  database to use when restoring from a BSON file

  -c, --collection=<collection-name>                        collection to use when restoring from a BSON file

      --excludeCollection=<collection-name>                 DEPRECATED; collection to skip over during restore (may be specified multiple times to exclude additional collections)

      --excludeCollectionsWithPrefix=<collection-prefix>    DEPRECATED; collections to skip over during restore that have the given prefix (may be specified multiple times to exclude additional prefixes)

      --nsExclude=<namespace-pattern>                       exclude matching namespaces

      --nsInclude=<namespace-pattern>                       include matching namespaces

      --nsFrom=<namespace-pattern>                          rename matching namespaces, must have matching nsTo

      --nsTo=<namespace-pattern>                            rename matched namespaces, must have matching nsFrom


input options:

      --objcheck                                            validate all objects before inserting

      --oplogReplay                                         replay oplog for point-in-time restore

      --oplogLimit=<seconds>[:ordinal]                      only include oplog entries before the provided Timestamp

      --oplogFile=<filename>                                oplog file to use for replay of oplog

      --archive=<filename>                                  restore dump from the specified archive file. If flag is specified without a value, archive is read from stdin

      --restoreDbUsersAndRoles                              restore user and role definitions for the given database

      --dir=<directory-name>                                input directory, use '-' for stdin

      --gzip                                                decompress gzipped input


restore options:

      --drop                                                drop each collection before import

      --dryRun                                              view summary without importing anything. recommended with verbosity

      --writeConcern=<write-concern>                        write concern options e.g. --writeConcern majority, --writeConcern '{w: 3, wtimeout: 500, fsync: true, j: true}'

      --noIndexRestore                                      don't restore indexes

      --noOptionsRestore                                    don't restore collection options

      --keepIndexVersion                                    don't update index version

      --maintainInsertionOrder                              preserve order of documents during restoration

  -j, --numParallelCollections=                             number of collections to restore in parallel (4 by default) (default: 4)

      --numInsertionWorkersPerCollection=                   number of insert operations to run concurrently per collection (1 by default) (default: 1)

      --stopOnError                                         stop restoring if an error is encountered on insert (off by default)

      --bypassDocumentValidation                            bypass document validation

      --preserveUUID                                        preserve original collection UUIDs (off by default, requires drop)
Das Wiederherstellen bestimmter Sammlungen in MongoDB kann mithilfe der Parametersammlung in mongorestore erfolgen. Angenommen, Sie haben eine Bestelldatenbank, in der Bestelldatenbank gibt es einige Sammlungen, wie unten gezeigt:
my_mongodb_0:PRIMARY> show dbs;

admin   0.000GB

config  0.000GB

local   0.000GB

orders  0.000GB

my_mongodb_0:PRIMARY> use orders;

my_mongodb_0:PRIMARY> show collections;

order_details

orders

stock
Wir haben bereits ein Backup für die Auftragsdatenbank geplant und möchten die Bestandssammlung in einer neuen Datenbank order_new auf demselben Server wiederherstellen. Wenn Sie die Option --collection verwenden möchten, müssen Sie den Sammlungsnamen als Parameter von mongorestore übergeben oder Sie können die Option --nsInclude={db}.{collection} verwenden, wenn Sie den Pfad zur Sammlungsdatei nicht angegeben haben .
example@sqldat.com:~/dump/orders# mongorestore -umongoadmin --authenticationDatabase admin --db order_new --collection stock /root/dump/orders/stock.bson
Enter password:
2020-03-09T04:06:29.100+0000 checking for collection data in /root/dump/orders/stock.bson
2020-03-09T04:06:29.110+0000 reading metadata for order_new.stock from /root/dump/orders/stock.metadata.json
2020-03-09T04:06:29.134+0000 restoring order_new.stock from /root/dump/orders/stock.bson
2020-03-09T04:06:29.202+0000 no indexes to restore
2020-03-09T04:06:29.203+0000 finished restoring order_new.stock (1 document)
2020-03-09T04:06:29.203+0000 doneSie können die Sammlung in der Datenbank order_new wie unten gezeigt überprüfen:
my_mongodb_0:PRIMARY> use order_new;
switched to db order_new
my_mongodb_0:PRIMARY> show collections;
stockWie wir mit Mongodump in ClusterControl wiederherstellen können
Das Wiederherstellen eines Backup-Dumps über ClusterControl ist einfach, Sie benötigen nur 2 Schritte, um das Backup wiederherzustellen. Es werden viele Backup-Dateien in der Liste sein, wenn Sie Ihren Backup-Zeitplan aktiviert haben, es gibt einige Informationen über die Backups, die sehr nützlich sein können. Beispielsweise der Sicherungsstatus, der angibt, ob die Sicherung abgeschlossen / fehlgeschlagen ist, die verwendete Sicherungsmethode, die Liste der Datenbanken und die Größe des Dumps. Die Schritte zum Wiederherstellen von MongoDB-Daten über ClusterControl sind wie folgt:
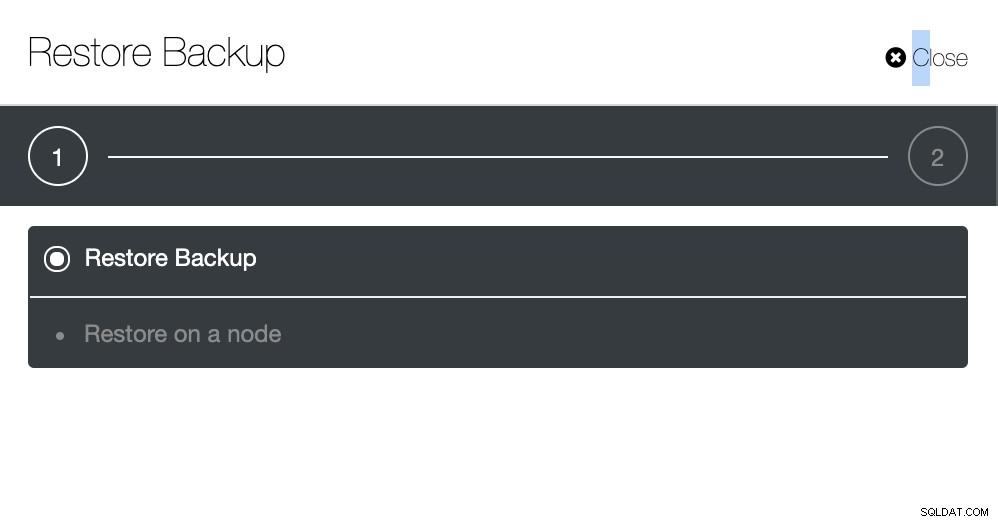
Schritt Eins
Folgen Sie den Eingabeaufforderungen, um die Sicherung wie unten gezeigt auf einem Knoten wiederherzustellen...
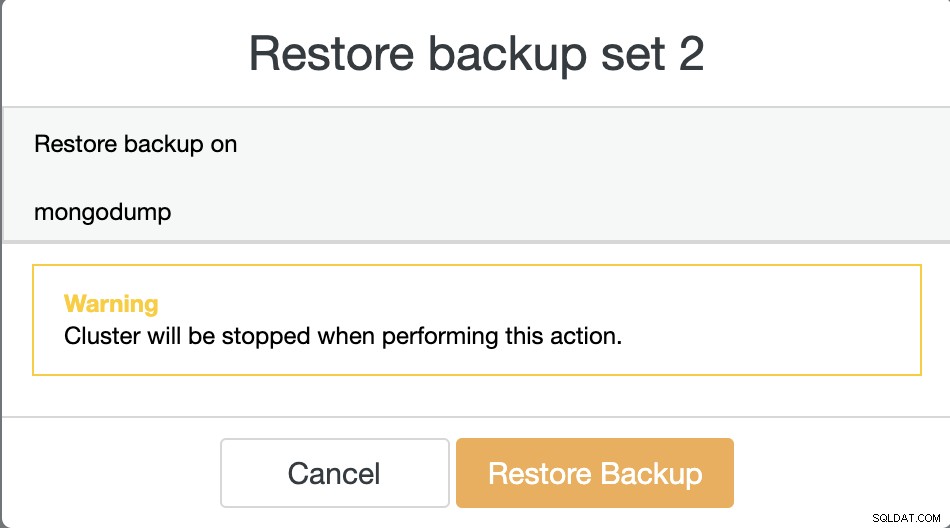
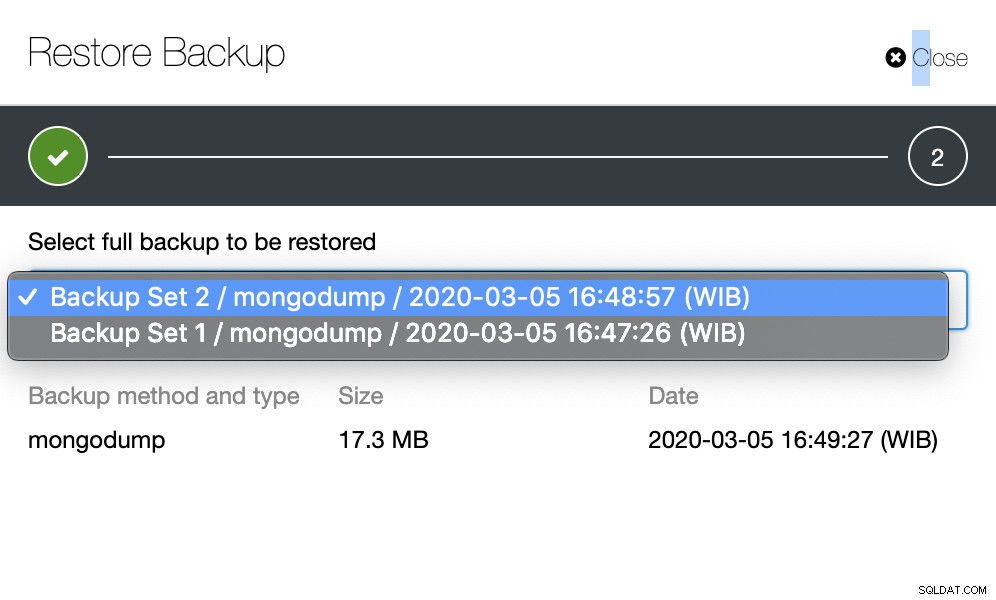
Schritt Zwei
Sie müssen auswählen, welches Backup wiederhergestellt werden soll.
Schritt Drei
Überprüfen Sie die Zusammenfassung...