Dies ist Teil 3 einer 4-teiligen Serie zum Erstellen eines Blogs mit PHP und MySQL. Sie können die vorherigen zwei Teile hier ansehen:Teil 1, Teil 2.
In den letzten beiden Teilen dieses Tutorials haben wir die Erstellung des öffentlichen Bereichs abgeschlossen. Wir haben sogar unsere Datenbank eingerichtet, einige Daten in die Datenbanktabellen eingefügt und konnten diese abfragen und auf der Seite anzeigen. Aber wir wollen doch nicht immer Benutzer, Posts, Themen mit einem Datenbank-Client wie PHPMyAdmin erstellen, oder? Wir wollen eine Schnittstelle auf der Website und einen angemeldeten Benutzer mit Administratorrechten, um dies zu tun.
Wenn sich ein Benutzer mit Administratorrechten anmeldet, wird er automatisch zum Administrator-Dashboard umgeleitet. Aber wir haben noch keinen Admin-Benutzer in unserem System erstellt. Das werden wir bald tun.
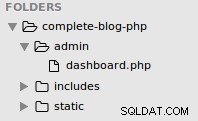
Erstellen Sie in Ihrem Ordner „complete-blog-php/admin“ eine Datei mit dem Namen dashboard.php.
Dashboard.php:
<?php include('../config.php'); ?>
<?php include(ROOT_PATH . '/admin/includes/admin_functions.php'); ?>
<?php include(ROOT_PATH . '/admin/includes/head_section.php'); ?>
<title>Admin | Dashboard</title>
</head>
<body>
<div class="header">
<div class="logo">
<a href="<?php echo BASE_URL .'admin/dashboard.php' ?>">
<h1>LifeBlog - Admin</h1>
</a>
</div>
<?php if (isset($_SESSION['user'])): ?>
<div class="user-info">
<span><?php echo $_SESSION['user']['username'] ?></span>
<a href="<?php echo BASE_URL . '/logout.php'; ?>" class="logout-btn">logout</a>
</div>
<?php endif ?>
</div>
<div class="container dashboard">
<h1>Welcome</h1>
<div class="stats">
<a href="users.php" class="first">
<span>43</span> <br>
<span>Newly registered users</span>
</a>
<a href="posts.php">
<span>43</span> <br>
<span>Published posts</span>
</a>
<a>
<span>43</span> <br>
<span>Published comments</span>
</a>
</div>
<br><br><br>
<div class="buttons">
<a href="users.php">Add Users</a>
<a href="posts.php">Add Posts</a>
</div>
</div>
</body>
</html>
Besuchen Sie in Ihrem Browser https://localhost/complete-blog-php/admin/dashboard.php und Sie werden sehen, dass es kein Styling gibt und es Fehlermeldungen über das Versäumnis gibt, zwei Dateien einzubinden. Das liegt daran, dass wir diese Dateien noch nicht erstellt haben. Das machen wir bald.
Erstellen Sie in Ihrem Verwaltungsordner einen Ordner mit dem Namen "includes".

Der Grund, warum wir einen separaten Includes-Ordner für den Admin-Bereich erstellt haben, besteht darin, sicherzustellen, dass sich alle Admin-Dateien in einem Ordner (admin) befinden. Später können wir die Sicherheit des Admin-Ordners mithilfe der htaccess-Authentifizierung verstärken. Wir werden das in diesem Tutorial jedoch nicht tun.
Erstellen Sie in diesem neu erstellten Ordner „includes“ eine Datei mit dem Namen „head_section.php“. Öffnen Sie head_section.php und fügen Sie diesen Code hinzu:
<!DOCTYPE html>
<html>
<head>
<meta charset="UTF-8">
<!-- Google Fonts -->
<link href="https://fonts.googleapis.com/css?family=Averia+Serif+Libre|Noto+Serif|Tangerine" rel="stylesheet">
<!-- Font awesome -->
<link rel="stylesheet" href="https://cdnjs.cloudflare.com/ajax/libs/font-awesome/4.7.0/css/font-awesome.min.css" />
<!-- ckeditor -->
<script src="https://cdnjs.cloudflare.com/ajax/libs/ckeditor/4.8.0/ckeditor.js"></script>
<!-- Styling for public area -->
<link rel="stylesheet" href="../static/css/admin_styling.css">
Laden Sie die Seite dashboard.php im Browser neu. Jetzt ist die verbleibende Fehlermeldung nur für eine Datei (admin_functions.php). Dazu kommen wir gleich.
Im Back-End kann der Nutzer Nutzer, Beiträge und Themen erstellen, lesen, aktualisieren und löschen. Beginnen wir mit den Benutzern. Erstellen Sie in Ihrem Admin-Ordner eine Datei namens users.php

Öffnen Sie nun die users.php und fügen Sie diesen Code hinzu:
Benutzer.php:
<?php include('../config.php'); ?>
<?php include(ROOT_PATH . '/admin/includes/admin_functions.php'); ?>
<?php
// Get all admin users from DB
$admins = getAdminUsers();
$roles = ['Admin', 'Author'];
?>
<?php include(ROOT_PATH . '/admin/includes/head_section.php'); ?>
<title>Admin | Manage users</title>
</head>
<body>
<!-- admin navbar -->
<?php include(ROOT_PATH . '/admin/includes/navbar.php') ?>
<div class="container content">
<!-- Left side menu -->
<?php include(ROOT_PATH . '/admin/includes/menu.php') ?>
<!-- Middle form - to create and edit -->
<div class="action">
<h1 class="page-title">Create/Edit Admin User</h1>
<form method="post" action="<?php echo BASE_URL . 'admin/users.php'; ?>" >
<!-- validation errors for the form -->
<?php include(ROOT_PATH . '/includes/errors.php') ?>
<!-- if editing user, the id is required to identify that user -->
<?php if ($isEditingUser === true): ?>
<input type="hidden" name="admin_id" value="<?php echo $admin_id; ?>">
<?php endif ?>
<input type="text" name="username" value="<?php echo $username; ?>" placeholder="Username">
<input type="email" name="email" value="<?php echo $email ?>" placeholder="Email">
<input type="password" name="password" placeholder="Password">
<input type="password" name="passwordConfirmation" placeholder="Password confirmation">
<select name="role">
<option value="" selected disabled>Assign role</option>
<?php foreach ($roles as $key => $role): ?>
<option value="<?php echo $role; ?>"><?php echo $role; ?></option>
<?php endforeach ?>
</select>
<!-- if editing user, display the update button instead of create button -->
<?php if ($isEditingUser === true): ?>
<button type="submit" class="btn" name="update_admin">UPDATE</button>
<?php else: ?>
<button type="submit" class="btn" name="create_admin">Save User</button>
<?php endif ?>
</form>
</div>
<!-- // Middle form - to create and edit -->
<!-- Display records from DB-->
<div class="table-div">
<!-- Display notification message -->
<?php include(ROOT_PATH . '/includes/messages.php') ?>
<?php if (empty($admins)): ?>
<h1>No admins in the database.</h1>
<?php else: ?>
<table class="table">
<thead>
<th>N</th>
<th>Admin</th>
<th>Role</th>
<th colspan="2">Action</th>
</thead>
<tbody>
<?php foreach ($admins as $key => $admin): ?>
<tr>
<td><?php echo $key + 1; ?></td>
<td>
<?php echo $admin['username']; ?>,
<?php echo $admin['email']; ?>
</td>
<td><?php echo $admin['role']; ?></td>
<td>
<a class="fa fa-pencil btn edit"
href="users.php?edit-admin=<?php echo $admin['id'] ?>">
</a>
</td>
<td>
<a class="fa fa-trash btn delete"
href="users.php?delete-admin=<?php echo $admin['id'] ?>">
</a>
</td>
</tr>
<?php endforeach ?>
</tbody>
</table>
<?php endif ?>
</div>
<!-- // Display records from DB -->
</div>
</body>
</html>
Das ist alles, was wir in der Datei users.php tun müssen. Das Erstellen, Bearbeiten und Löschen eines Benutzers erfolgt in dieser einen Datei.
Oben in der Datei users.php rufen wir eine Funktion getAdminUsers() auf, die ein Array aller Admin-Benutzer aus der Datenbank zurückgibt. Diese Funktion muss in der Datei admin_functions.php definiert werden, die wir noch nicht erstellt haben, aber Sie können sie direkt vor dem Funktionsaufruf in unserer Datei users.php sehen.
Erstellen Sie in Ihrem Admin-Ordner admin_functions.php und fügen Sie diesen Code hinzu:
admin_functions.php:
<?php
// Admin user variables
$admin_id = 0;
$isEditingUser = false;
$username = "";
$role = "";
$email = "";
// general variables
$errors = [];

/* - - - - - - - - - -
-  Admin users actions
- - - - - - - - - - -*/
// if user clicks the create admin button
if (isset($_POST['create_admin'])) {
	createAdmin($_POST);
}
// if user clicks the Edit admin button
if (isset($_GET['edit-admin'])) {
	$isEditingUser = true;
	$admin_id = $_GET['edit-admin'];
	editAdmin($admin_id);
}
// if user clicks the update admin button
if (isset($_POST['update_admin'])) {
	updateAdmin($_POST);
}
// if user clicks the Delete admin button
if (isset($_GET['delete-admin'])) {
	$admin_id = $_GET['delete-admin'];
	deleteAdmin($admin_id);
}


/* * * * * * * * * * * * * * * * * * * * * * * * * * * * *
* - Returns all admin users and their corresponding roles
* * * * * * * * * * * * * * * * * * * * * * * * * * * * * */
function getAdminUsers(){
	global $conn, $roles;
	$sql = "SELECT * FROM users WHERE role IS NOT NULL";
	$result = mysqli_query($conn, $sql);
	$users = mysqli_fetch_all($result, MYSQLI_ASSOC);

	return $users;
}
/* * * * * * * * * * * * * * * * * * * * *
* - Escapes form submitted value, hence, preventing SQL injection
* * * * * * * * * * * * * * * * * * * * * */
function esc(String $value){
	// bring the global db connect object into function
	global $conn;
	// remove empty space sorrounding string
	$val = trim($value);
	$val = mysqli_real_escape_string($conn, $value);
	return $val;
}
// Receives a string like 'Some Sample String'
// and returns 'some-sample-string'
function makeSlug(String $string){
	$string = strtolower($string);
	$slug = preg_replace('/[^A-Za-z0-9-]+/', '-', $string);
	return $slug;
}
?>
Laden Sie die Seite dashboard.php in Ihrem Browser neu und die Fehlermeldung ist weg.
Als Nächstes fügen Sie die Seiten "navbar.php" und "menu.php" ein. Dies sind sich wiederholende Segmente von Admin-Seiten, genau wie es beim öffentlichen Bereich der Fall war.
Erstellen Sie also diese beiden Dateien im Ordner admin/includes :navbar.php und menu.php.
navbar.php:
<div class="header">
<div class="logo">
<a href="<?php echo BASE_URL .'admin/dashboard.php' ?>">
<h1>LifeBlog - Admin</h1>
</a>
</div>
<div class="user-info">
<span>Awa</span> <a href="<?php echo BASE_URL . '/logout.php'; ?>" class="logout-btn">logout</a>
</div>
</div>menu.php:
<div class="menu">
	<div class="card">
		<div class="card-header">
			<h2>Actions</h2>
		</div>
		<div class="card-content">
			<a href="<?php echo BASE_URL . 'admin/create_post.php' ?>">Create Posts</a>
			<a href="<?php echo BASE_URL . 'admin/posts.php' ?>">Manage Posts</a>
			<a href="<?php echo BASE_URL . 'admin/users.php' ?>">Manage Users</a>
			<a href="<?php echo BASE_URL . 'admin/topics.php' ?>">Manage Topics</a>
		</div>
	</div>
</div>
Lassen Sie uns nun ein Styling für den Admin-Bereich erstellen. Erstellen Sie im Ordner complete-blog-php/static/css/ eine Datei mit dem Namen admin_styling.css und fügen Sie diesen Code hinzu:
/* * * * * * * * * *
* STYLING DEFAULTS
* * * * * * * * * */
* { margin: 0px; padding: 0px; }
a { text-decoration: none; }
h1, h2, h3, h4, h5, h6 { font-family: 'Noto Serif', serif; }
/* forms */
form { width: 60%; margin: 5px auto; padding-bottom: 50px; }
form input[type=file], input[type=email], input[type=password], input[type=text],
form select, form textarea {
	width: 100%;
	display: block;
	padding: 13px 13px;
	font-size: 1em;
	margin: 5px auto 10px;
	border-radius: 3px;
	box-sizing : border-box;
	background: transparent;
	border: 1px solid #3E606F;
}
input[type="checkbox"] { height: 20px; float: left; }
form button { float: right; margin-left: 24%; }
form input:focus { outline: none; }
label {	margin-top: 20px; float: left; }
/* tables */
table { border-collapse: collapse; width: 70%; margin: 20px auto; }
th, td { padding: 8px; text-align: left; border: 1px solid #ddd; }
th { text-align: center;}
/* buttons */
.btn {
	color: white;
	background: #4E6166;
	text-align: center;
	border: none;
	border-radius: 5px;
	display: block;
	letter-spacing: .1em;
	padding: 13px 20px;
	text-decoration: none;
}
/* * * * * * * * * *
* HEADER
* * * * * * * * * */
.header {
	padding: 15px 45px;
	font-family: 'Noto Serif', serif;
	color: white;
	background: black;
}
.header .logo { width: 50%; float: left; }
.header .logo h1 { color: white; }
.header .user-info { width: 10%; margin-top: 10px; float: right;}
.header .logout-btn { color: red; text-decoration: none; }
.header:after{ content: ""; display: block; clear: both; }
/* * * * * * * * * *
* DASHBOARD
* * * * * * * * * */
.container {
	width: 95%;
	margin: 5px auto 50px;
	border: 1px solid #BFBCB3;
	padding: 10px 0px 50px;
}
.container:after { content: ""; display: block; clear: both; }
.container.dashboard h1 { text-align: center; margin: 25px; }
.container.dashboard .stats a {
	display: inline-block;
	padding: 30px;
	margin: 5px;
	width: 25%;
	text-align: center;
	border-radius: 3px;
	border: 1px solid #BFBCB3;
}
.container.dashboard .stats a.first { margin-left: 25px; }
.container.dashboard .stats a:hover { cursor: pointer; background-color: #E1E1E1; }
.container.dashboard .buttons { margin-left: 15px; }
.container.dashboard .buttons a {
	display: inline-block;
	margin: 10px;
	text-decoration: none;
	color: #444;
	padding: 10px 25px;
	border: none;
	background-color: #0E7D92;
	color: white;
}
/* * * * * * * * * *
* PAGE CONTENT
* * * * * * * * * */
.container.content .menu { width: 16%; float: left; padding: 40px 10px; }
/* Menu card */
.container.content .menu .card .card-header {
	padding: 10px;
	text-align: center;
	border-radius: 3px 3px 0px 0px;
	background: #3E606F;
}
.container.content .menu .card .card-header h2 { color: white; }
.container.content .menu .card .card-content a {
	display: block;
	box-sizing: border-box;
	padding: 8px 10px;
	border-bottom: 1px solid #e4e1e1;
	color: #444;
}
.container.content .menu .card .card-content a:hover {
	padding-left: 20px; background: #F9F9F9; transition: 0.1s;
}
/* Actions div (at the middle) */
.container.content .action { width: 35%; float: left; text-align: center; }
.container.content .action form { width: 90%; }
.container.content .action .page-title { margin: 25px; }
.container.content .action.create-post-div { width: 80%; }
/* Table div (Displaying records from DB) */
.table-div { float: left; width: 47%; }
.table-div .message { width: 90%; margin-top: 20px; }
.table-div table { width: 90%; }
.table-div a.fa { color: white; padding: 3px; }
.table-div .edit { background: #004220; }
.table-div .delete { background: #F70E1A; }
.table-div .publish { background: red; }
.table-div .unpublish { background: green; }
/* * * * * * * * * *
* VALIDATION ERRORS
* * * * * * * * * */
.message {
	width: 100%;
	margin: 0px auto;
	padding: 10px 0px;
	color: #3c763d;
	background: #dff0d8;
	border: 1px solid #3c763d;
	border-radius: 5px;
	text-align: center;
}
.error {color: #a94442; background: #f2dede; border: 1px solid #a94442; margin-bottom: 20px; }
.validation_errors p {text-align: left;margin-left: 10px;}
Rufen Sie in Ihrem Browser https://localhost/complete-blog-php/admin/users.php auf. Dort wird eine Fehlermeldung angezeigt, die besagt, dass die Datei messages.php nicht gefunden wurde. Erstellen Sie eine Datei mit dem Namen messages.php in Ihrem Ordner „complete-blog-ph/includes“ und fügen Sie diesen Code hinzu:
<?php if (isset($_SESSION['message'])) : ?>
      <div class="message" >
      	<p>
          <?php
          	echo $_SESSION['message'];
          	unset($_SESSION['message']);
          ?>
      	</p>
      </div>
<?php endif ?>
Dies zeigt Benachrichtigungen an, um dem Benutzer Feedback zu seinen Aktionen zu geben.
Administratorbenutzer erstellen, lesen, aktualisieren und löschen
Die Seite users.php enthält bereits ein Formular zum Erstellen und Aktualisieren eines Administratorbenutzers sowie eine Tabelle zum Auflisten und Löschen von Benutzern. Es müssen nur noch die PHP-Funktionen hinzugefügt werden, die diese Aktionen ausführen. Öffnen Sie also die Datei admin_functions.php und fügen Sie diesen Code direkt nach den Admin-Benutzeraktionen (den if-Anweisungen) oben auf der Seite und vor der Funktion getAdminUsers() ein:
admin_functions.php:
/* - - - - - - - - - - - -
-  Admin users functions
- - - - - - - - - - - - -*/
/* * * * * * * * * * * * * * * * * * * * * * *
* - Receives new admin data from form
* - Create new admin user
* - Returns all admin users with their roles
* * * * * * * * * * * * * * * * * * * * * * */
function createAdmin($request_values){
	global $conn, $errors, $role, $username, $email;
	$username = esc($request_values['username']);
	$email = esc($request_values['email']);
	$password = esc($request_values['password']);
	$passwordConfirmation = esc($request_values['passwordConfirmation']);

	if(isset($request_values['role'])){
		$role = esc($request_values['role']);
	}
	// form validation: ensure that the form is correctly filled
	if (empty($username)) { array_push($errors, "Uhmm...We gonna need the username"); }
	if (empty($email)) { array_push($errors, "Oops.. Email is missing"); }
	if (empty($role)) { array_push($errors, "Role is required for admin users");}
	if (empty($password)) { array_push($errors, "uh-oh you forgot the password"); }
	if ($password != $passwordConfirmation) { array_push($errors, "The two passwords do not match"); }
	// Ensure that no user is registered twice.
	// the email and usernames should be unique
	$user_check_query = "SELECT * FROM users WHERE username='$username'
							OR email='$email' LIMIT 1";
	$result = mysqli_query($conn, $user_check_query);
	$user = mysqli_fetch_assoc($result);
	if ($user) { // if user exists
		if ($user['username'] === $username) {
		  array_push($errors, "Username already exists");
		}

		if ($user['email'] === $email) {
		  array_push($errors, "Email already exists");
		}
	}
	// register user if there are no errors in the form
	if (count($errors) == 0) {
		$password = md5($password);//encrypt the password before saving in the database
		$query = "INSERT INTO users (username, email, role, password, created_at, updated_at)
				  VALUES('$username', '$email', '$role', '$password', now(), now())";
		mysqli_query($conn, $query);

		$_SESSION['message'] = "Admin user created successfully";
		header('location: users.php');
		exit(0);
	}
}
/* * * * * * * * * * * * * * * * * * * * *
* - Takes admin id as parameter
* - Fetches the admin from database
* - sets admin fields on form for editing
* * * * * * * * * * * * * * * * * * * * * */
function editAdmin($admin_id)
{
	global $conn, $username, $role, $isEditingUser, $admin_id, $email;

	$sql = "SELECT * FROM users WHERE id=$admin_id LIMIT 1";
	$result = mysqli_query($conn, $sql);
	$admin = mysqli_fetch_assoc($result);

	// set form values ($username and $email) on the form to be updated
	$username = $admin['username'];
	$email = $admin['email'];
}

/* * * * * * * * * * * * * * * * * * * * * * * * * * * * * *
* - Receives admin request from form and updates in database
* * * * * * * * * * * * * * * * * * * * * * * * * * * * * * */
function updateAdmin($request_values){
	global $conn, $errors, $role, $username, $isEditingUser, $admin_id, $email;
	// get id of the admin to be updated
	$admin_id = $request_values['admin_id'];
	// set edit state to false
	$isEditingUser = false;


	$username = esc($request_values['username']);
	$email = esc($request_values['email']);
	$password = esc($request_values['password']);
	$passwordConfirmation = esc($request_values['passwordConfirmation']);
	if(isset($request_values['role'])){
		$role = $request_values['role'];
	}
	// register user if there are no errors in the form
	if (count($errors) == 0) {
		//encrypt the password (security purposes)
		$password = md5($password);

		$query = "UPDATE users SET username='$username', email='$email', role='$role', password='$password' WHERE id=$admin_id";
		mysqli_query($conn, $query);

		$_SESSION['message'] = "Admin user updated successfully";
		header('location: users.php');
		exit(0);
	}
}
// delete admin user
function deleteAdmin($admin_id) {
	global $conn;
	$sql = "DELETE FROM users WHERE id=$admin_id";
	if (mysqli_query($conn, $sql)) {
		$_SESSION['message'] = "User successfully deleted";
		header("location: users.php");
		exit(0);
	}
}
Der gerade hinzugefügte Code besteht aus drei Hauptteilen:Initialisierung von Admin-Benutzervariablen, Admin-Benutzeraktionen und Admin-Benutzerfunktionen, in dieser Reihenfolge. Dies ist das gleiche Format, in dem wir Code für die nächsten Themen hinzufügen werden. Im Moment können Sie bereits einen Benutzer erstellen, lesen, aktualisieren und löschen.
Gehen Sie jetzt zu https://localhost/complete/admin/users.php. Erstellen Sie einen Benutzer und weisen Sie diesem Benutzer die Administratorrolle zu. Denken Sie daran, sich den Benutzernamen und das Passwort dieses Admin-Benutzers zu merken, da wir uns in Zukunft mit diesem Benutzer anmelden werden. Zum Beispiel:
Benutzername:John, E-Mail:john@example.com, Passwort:johndoe.
Themen erstellen, lesen, aktualisieren und löschen
Für Themen erstellen wir nur eine Datei, themen.php im Ordner complete-blog-php/admin/.
komplett-blog-php/admin/topics.php:
<?php  include('../config.php'); ?>
<?php  include(ROOT_PATH . '/admin/includes/admin_functions.php'); ?>
<?php include(ROOT_PATH . '/admin/includes/head_section.php'); ?>
<!-- Get all topics from DB -->
<?php $topics = getAllTopics();	?>
	<title>Admin | Manage Topics</title>
</head>
<body>
	<!-- admin navbar -->
	<?php include(ROOT_PATH . '/admin/includes/navbar.php') ?>
	<div class="container content">
		<!-- Left side menu -->
		<?php include(ROOT_PATH . '/admin/includes/menu.php') ?>

		<!-- Middle form - to create and edit -->
		<div class="action">
			<h1 class="page-title">Create/Edit Topics</h1>
			<form method="post" action="<?php echo BASE_URL . 'admin/topics.php'; ?>" >
				<!-- validation errors for the form -->
				<?php include(ROOT_PATH . '/includes/errors.php') ?>
				<!-- if editing topic, the id is required to identify that topic -->
				<?php if ($isEditingTopic === true): ?>
					<input type="hidden" name="topic_id" value="<?php echo $topic_id; ?>">
				<?php endif ?>
				<input type="text" name="topic_name" value="<?php echo $topic_name; ?>" placeholder="Topic">
				<!-- if editing topic, display the update button instead of create button -->
				<?php if ($isEditingTopic === true): ?>
					<button type="submit" class="btn" name="update_topic">UPDATE</button>
				<?php else: ?>
					<button type="submit" class="btn" name="create_topic">Save Topic</button>
				<?php endif ?>
			</form>
		</div>
		<!-- // Middle form - to create and edit -->

		<!-- Display records from DB-->
		<div class="table-div">
			<!-- Display notification message -->
			<?php include(ROOT_PATH . '/includes/messages.php') ?>
			<?php if (empty($topics)): ?>
				<h1>No topics in the database.</h1>
			<?php else: ?>
				<table class="table">
					<thead>
						<th>N</th>
						<th>Topic Name</th>
						<th colspan="2">Action</th>
					</thead>
					<tbody>
					<?php foreach ($topics as $key => $topic): ?>
						<tr>
							<td><?php echo $key + 1; ?></td>
							<td><?php echo $topic['name']; ?></td>
							<td>
								<a class="fa fa-pencil btn edit"
									href="topics.php?edit-topic=<?php echo $topic['id'] ?>">
								</a>
							</td>
							<td>
								<a class="fa fa-trash btn delete"
									href="topics.php?delete-topic=<?php echo $topic['id'] ?>">
								</a>
							</td>
						</tr>
					<?php endforeach ?>
					</tbody>
				</table>
			<?php endif ?>
		</div>
		<!-- // Display records from DB -->
	</div>
</body>
</html>
Als nächstes schreiben wir den PHP-Code in admin_functions.php, um diese Operationen zum Thema auszuführen.
Der folgende Code besteht aus drei Abschnitten. Jeder Abschnitt wurde oben mit einem Kommentar gekennzeichnet und die drei sind Variablen, Aktionen und Funktionen. Fügen Sie also in Ihrer admin_functions.php-Datei den folgenden Code hinzu, aber stellen Sie sicher, dass Sie ihn entsprechend wie unten angegeben unter Verwendung der Kommentare aufteilen.
admin_functions.php:
<?php
// Admin user variables
// ... varaibles here ...

// Topics variables
$topic_id = 0;
$isEditingTopic = false;
$topic_name = "";

/* - - - - - - - - - -
-  Admin users actions
- - - - - - - - - - -*/
// ...

/* - - - - - - - - - -
-  Topic actions
- - - - - - - - - - -*/
// if user clicks the create topic button
if (isset($_POST['create_topic'])) { createTopic($_POST); }
// if user clicks the Edit topic button
if (isset($_GET['edit-topic'])) {
	$isEditingTopic = true;
	$topic_id = $_GET['edit-topic'];
	editTopic($topic_id);
}
// if user clicks the update topic button
if (isset($_POST['update_topic'])) {
	updateTopic($_POST);
}
// if user clicks the Delete topic button
if (isset($_GET['delete-topic'])) {
	$topic_id = $_GET['delete-topic'];
	deleteTopic($topic_id);
}


/* - - - - - - - - - - - -
-  Admin users functions
- - - - - - - - - - - - -*/
// ...

/* - - - - - - - - - -
-  Topics functions
- - - - - - - - - - -*/
// get all topics from DB
function getAllTopics() {
	global $conn;
	$sql = "SELECT * FROM topics";
	$result = mysqli_query($conn, $sql);
	$topics = mysqli_fetch_all($result, MYSQLI_ASSOC);
	return $topics;
}
function createTopic($request_values){
	global $conn, $errors, $topic_name;
	$topic_name = esc($request_values['topic_name']);
	// create slug: if topic is "Life Advice", return "life-advice" as slug
	$topic_slug = makeSlug($topic_name);
	// validate form
	if (empty($topic_name)) {
		array_push($errors, "Topic name required");
	}
	// Ensure that no topic is saved twice.
	$topic_check_query = "SELECT * FROM topics WHERE slug='$topic_slug' LIMIT 1";
	$result = mysqli_query($conn, $topic_check_query);
	if (mysqli_num_rows($result) > 0) { // if topic exists
		array_push($errors, "Topic already exists");
	}
	// register topic if there are no errors in the form
	if (count($errors) == 0) {
		$query = "INSERT INTO topics (name, slug)
				  VALUES('$topic_name', '$topic_slug')";
		mysqli_query($conn, $query);

		$_SESSION['message'] = "Topic created successfully";
		header('location: topics.php');
		exit(0);
	}
}
/* * * * * * * * * * * * * * * * * * * * *
* - Takes topic id as parameter
* - Fetches the topic from database
* - sets topic fields on form for editing
* * * * * * * * * * * * * * * * * * * * * */
function editTopic($topic_id) {
	global $conn, $topic_name, $isEditingTopic, $topic_id;
	$sql = "SELECT * FROM topics WHERE id=$topic_id LIMIT 1";
	$result = mysqli_query($conn, $sql);
	$topic = mysqli_fetch_assoc($result);
	// set form values ($topic_name) on the form to be updated
	$topic_name = $topic['name'];
}
function updateTopic($request_values) {
	global $conn, $errors, $topic_name, $topic_id;
	$topic_name = esc($request_values['topic_name']);
	$topic_id = esc($request_values['topic_id']);
	// create slug: if topic is "Life Advice", return "life-advice" as slug
	$topic_slug = makeSlug($topic_name);
	// validate form
	if (empty($topic_name)) {
		array_push($errors, "Topic name required");
	}
	// register topic if there are no errors in the form
	if (count($errors) == 0) {
		$query = "UPDATE topics SET name='$topic_name', slug='$topic_slug' WHERE id=$topic_id";
		mysqli_query($conn, $query);

		$_SESSION['message'] = "Topic updated successfully";
		header('location: topics.php');
		exit(0);
	}
}
// delete topic
function deleteTopic($topic_id) {
	global $conn;
	$sql = "DELETE FROM topics WHERE id=$topic_id";
	if (mysqli_query($conn, $sql)) {
		$_SESSION['message'] = "Topic successfully deleted";
		header("location: topics.php");
		exit(0);
	}
}
Damit können wir Themen erstellen, lesen, aktualisieren und löschen.
Danke für Ihre Geduld. Im nächsten Teil fügen wir ein Formular zum Erstellen von Beiträgen hinzu. Wir verwenden ckeditor, um einem Benutzer die Möglichkeit zu geben, Texten, Bildern und Listen Stile hinzuzufügen.
Wir sehen uns dort!