Auf dem heutigen Markt, wo täglich eine riesige Menge an Daten generiert wird, ist es sehr wichtig zu verstehen, wie man mit Daten umgeht. SQL Server ist eine integrierte Umgebung, die von Microsoft entwickelt wurde, um Daten zu verarbeiten. In diesem Artikel zum SQL Server-Lernprogramm lernen Sie alle Vorgänge und Befehle kennen, die Sie zum Erkunden Ihrer Datenbanken benötigen.
Zum besseren Verständnis habe ich den Blog in folgende Kategorien eingeteilt:
| Befehle | Beschreibung |
Data Definition Language-Befehle (DDL) | Dieser Befehlssatz wird verwendet, um eine Datenbank zu definieren. |
Data Manipulation Language-Befehle (DML) | Die Manipulationsbefehle werden verwendet, um die in der Datenbank vorhandenen Daten zu manipulieren. |
Data Control Language-Befehle (DCL) | Dieser Befehlssatz befasst sich mit den Berechtigungen, Rechten und anderen Kontrollen der Datenbanksysteme. |
Transaction Control Language-Befehle (TCL) | Diese Befehle werden verwendet, um mit der Transaktion der Datenbank umzugehen. |
Abgesehen von den Befehlen werden in diesem Artikel die folgenden Themen behandelt:

- Was ist SQL Server?
- SQL-Server installieren
- Mit SSMS eine Verbindung zu SQL Server herstellen
- Access-Datenbankmodul
- SQL Server-Architektur
- Kommentare in SQL
- SQL Server-Datentypen
- Schlüssel in der Datenbank
- Einschränkungen in der Datenbank
- Operatoren
- Aggregatfunktionen
- Benutzerdefinierte Funktionen
- Verschachtelte Abfragen
- Beitreten
- Schleifen
- Gespeicherte Prozeduren
- Ausnahmebehandlung
***HINWEIS*** In diesem SQL Server-Tutorial werde ich die folgende Datenbank als Beispiel betrachten, um Ihnen zu zeigen, wie Sie Befehle lernen und schreiben.
| Schüler-ID | Schülername | Elternname | Telefonnummer | Adresse | Stadt | Land |
| 1 | Vihaan | Akriti Mehra | 9955339966 | Brigaden-Straßensperre 9 | Hyderabad | Indien |
| 2 | Manasa | Shourya Sharma | 9234568762 | Mayo Road 15 | Kolkata | Indien |
| 3 | Anay | Soumya Mishra | 9876914261 | Marathalli-Haus Nr. 101 | Bengaluru | Indien |
| 4 | Preeti | Rohan Sinha | 9765432234 | Queens Road 40 | Delhi | Indien |
| 5 | Shanaya | Abhinay Agarwal | 9878969068 | Oberoi-Straße 21 | Mumbai | Indien |
Bevor wir beginnen, die verschiedenen in SQL Server verwendeten Befehle zu verstehen, lassen Sie uns verstehen, was SQL Server ist, seine Architektur und wie es installiert wird.
Was ist SQL Server?
Microsoft SQL Server ist ein Verwaltungssystem für relationale Datenbanken. Es unterstützt die strukturierte Abfragesprache und verfügt über eine eigene Implementierung der SQL-Sprache, die Transact-SQL(T-SQL) ist . Es verfügt über eine integrierte Umgebung zur Handhabung von SQL-Datenbanken, nämlich das SQL Server Management Studio.
Die Schlüsselkomponenten von SQL Server sind wie folgt:
- Datenbankmodul: Diese Komponente übernimmt die Speicherung, die schnelle Transaktionsverarbeitung und die Datensicherung.
- SQL-Server – Dieser Dienst wird verwendet, um die Instanz von MS SQL Server zu starten, zu stoppen, anzuhalten und fortzusetzen.
- SQL Server-Agent – Der Server-Agent-Dienst spielt die Rolle des Aufgabenplaners und wird durch ein beliebiges Ereignis oder gemäß den Anforderungen ausgelöst.
- SQL Server-Browser – Dieser Dienst wird verwendet, um die eingehende Anfrage mit der gewünschten SQL Server-Instanz zu verbinden.
- SQL Server-Volltextsuche – Wird verwendet, damit der Benutzer Volltextabfragen für die Zeichendaten in SQL-Tabellen ausführen kann.
- SQL Server VSS Writer – Ermöglicht Backups und Wiederherstellung von Datendateien, wenn der SQL Server nicht läuft.
- SQL Server Analysis Services (SSAS) – Dieser Dienst wird verwendet, um Funktionen für Datenanalyse, Data Mining und maschinelles Lernen bereitzustellen. Der SQL Server ist auch mit Python und R für erweiterte Datenanalysen integriert.
- SQL Server Reporting Services (SSRS) – Wie der Name schon sagt, wird dieser Dienst verwendet, um Funktionen und Entscheidungshilfen bereitzustellen, einschließlich der Integration mit Hadoop.
- SQL Server Integration Services (SSIS) – Dieser Dienst wird verwendet, um die ETL-Vorgänge für verschiedene Datentypen aus mehreren Datenquellen durchzuführen.
Da Sie nun wissen, was MS SQL Server ist, lassen Sie uns in diesem Artikel zum SQL Server-Tutorial weitermachen und verstehen, wie der SQL Server installiert und eingerichtet wird.
SQL-Server installieren
Führen Sie die folgenden Schritte aus, um SQL Server zu installieren:
Schritt 1: Rufen Sie die offizielle Seite des Microsoft SQL Server-Downloads auf , wo Sie die Option finden, SQL Server entweder lokal oder in der Cloud zu installieren.
Schritt 2: Scrollen Sie jetzt nach unten und Sie sehen zwei Optionen: Developer &Enterprise Edition . Hier lade ich die Entwickleredition herunter . Zum Herunterladen müssen Sie nur auf Jetzt herunterladen klicken Möglichkeit. Siehe unten.
Schritt 3: Sobald die Anwendung heruntergeladen ist, doppelklicken Sie auf die Datei und Sie sehen das folgende Fenster.
Schritt 4: Jetzt können Sie eine der 3 Optionen zum Einrichten von SQL Server auswählen. Hier wähle ich einfach die Einfache Option . Nach Auswahl der Installationstyp-Option wäre der nächste Bildschirm, die Lizenzvereinbarung zu akzeptieren. Klicken Sie dazu auf Akzeptieren im folgenden Fenster.
Schritt 5: Als nächstes müssen Sie den Installationsort von SQL Server angeben. Dann müssen Sie auf Installieren klicken.
Klicken Sie einmal auf Installieren , sehen Sie, dass die erforderlichen Pakete heruntergeladen werden. Nun, nachdem die Installation abgeschlossen ist, sehen Sie den folgenden Bildschirm:
Hier können Sie entweder fortfahren und auf Jetzt verbinden klicken oder die Installation anpassen. Zum besseren Verständnis gehe ich weiter und wähle Anpassen.
Schritt 6: Sobald Sie auf Anpassen klicken Im obigen Fenster sehen Sie den folgenden Assistenten, der sich öffnet. Klicken Sie im folgenden Fenster auf Weiter.
Schritt 7: Nachdem die Regeln automatisch installiert wurden, klicken Sie auf Weiter . Siehe unten.
Schritt 8: Als nächstes müssen Sie den Installationstyp auswählen. Wählen Sie also Perform a Neuinstallation von SQL Server 2017 Option und klicken Sie dann auf Weiter.
Schritt 9: Wählen Sie im sich öffnenden Assistenten die Edition aus:Developer. Klicken Sie dann auf Weiter . Siehe unten.
Schritt 10: Lesen und akzeptieren Sie nun die Lizenzvereinbarungen, indem Sie das Optionsfeld aktivieren und dann auf Weiter klicken . Siehe unten.
Schritt 11: Im folgenden Assistenten können Sie die Funktionen auswählen, die Sie installieren möchten. Sie können auch das Stammverzeichnis der Instanz auswählen und dann auf Weiter klicken . Hier wähle ich die Datenbank-Engine-Dienste aus .
Schritt 12: Als nächstes müssen Sie die Instanz benennen, und automatisch wird die Instanz-ID erstellt. Hier nenne ich die Instanz „edureka“. Klicken Sie dann auf Weiter.
Schritt 13: Klicken Sie im Server-Konfigurationsassistenten auf Weiter .
Schritt 14: Jetzt müssen Sie die Authentifizierungsmodi aktivieren. Hier sehen Sie den Windows-Authentifizierungsmodus und Gemischter Modus . Ich werde den gemischten Modus wählen. Nennen Sie dann das Passwort und ich füge den aktuellen Benutzer als Admin hinzu indem Sie Aktuellen Benutzer hinzufügen auswählen Option.
Schritt 15: Wählen Sie dann den Pfad der Konfigurationsdatei und klicken Sie auf Installieren .
Nachdem die Installation abgeschlossen ist, sehen Sie den folgenden Bildschirm:
Mit SSMS eine Verbindung zu SQL Server herstellen
Nachdem der SQL Server installiert ist, besteht Ihr nächster Schritt darin, den SQL Server mit dem SQL Server Management Studio zu verbinden. Führen Sie dazu die folgenden Schritte aus:
Schritt 1: Gehen Sie zurück zum folgenden Fenster und klicken Sie auf SSMS installieren Option.
Schritt 2: Sobald Sie auf diese Option klicken, werden Sie auf die folgende Seite weitergeleitet, wo Sie SSMS herunterladen. auswählen müssen
Schritt 3: Nachdem das Setup heruntergeladen wurde, doppelklicken Sie auf die Anwendung und Sie werden sehen, dass sich der folgende Assistent öffnet.
Schritt 4: Klicken Sie auf Option installieren , im obigen Fenster und Sie werden sehen, dass die Installation beginnt.
Schritt 5: Nachdem die Installation abgeschlossen ist, erhalten Sie ein Dialogfeld wie unten gezeigt.
Nachdem Sie SSMS installiert haben, besteht der nächste Schritt darin, auf die Datenbank-Engine zuzugreifen .
Zugriff auf die Datenbank-Engine
Wenn Sie das SQL Server Management Studio öffnen aus dem Startmenü , öffnet sich ein Fenster ähnlich dem im Bild unten gezeigten Fenster.
Geben Sie hier den Servernamen und den Authentifizierungsmodus an und klicken Sie aufVerbinden.
Nachdem Sie auf Verbinden geklickt haben , sehen Sie den folgenden Bildschirm.
Nun Leute, so installieren und konfigurieren Sie den SQL Server. Lassen Sie uns nun in diesem SQL Server-Lernprogramm die verschiedenen Komponenten der Architektur von SQL Server verstehen.
SQL Server-Architektur
Die Architektur von SQL Server ist wie folgt:
- Server − Hier werden die SQL-Dienste installiert und die Datenbank gespeichert
- Relationale Engine − Enthält den Abfrageparser, den Optimierer und den Executor; und die Ausführung erfolgt in der relationalen Engine.
- Befehlsparser − Überprüft die Syntax der Abfrage und konvertiert die Abfrage in Maschinensprache.
- Optimierer − Bereitet den Ausführungsplan als Ausgabe vor, indem Statistiken, Abfragen und Algebrator-Baum als Eingabe verwendet werden.
- Abfrageausführer − Dies ist der Ort, an dem Abfragen Schritt für Schritt ausgeführt werden
- Speichermodul − Dieser ist verantwortlich für das Speichern und Abrufen von Daten auf dem Speichersystem, die Manipulation von Daten, das Verwalten und Sperren von Transaktionen.
Da Sie nun wissen, wie Sie SQL Server und seine verschiedenen Komponenten einrichten und installieren, beginnen wir mit dem Schreiben von Befehlen in SQL Server. Aber lassen Sie mich vorher erklären, wie man Kommentare in SQL Server schreibt.
Kommentare in SQL Server
Es gibt zwei Möglichkeiten, wie Sie in SQL kommentieren können, d. h. entweder verwenden Sie das s einzeilige Kommentare oder das m mehrzeilige Kommentare .
Einzeilige Kommentare
Die einzeiligen Kommentare beginnen mit zwei Bindestrichen (–). Daher wird der nach (–) erwähnte Text bis zum Ende einer einzelnen Zeile vom Compiler ignoriert.
Beispiel:
--Example of single line comments
Mehrzeilige Kommentare
Die mehrzeiligen Kommentare beginnen mit /* und enden mit */ . Daher der zwischen /* erwähnte Text und */ wird vom Compiler ignoriert.
Beispiel:
/* Example for
multi-line comments */
Lassen Sie uns nun in diesem Artikel zum SQL Server-Lernprogramm mit dem ersten Befehlssatz beginnen, d. h. den Befehlen der Datendefinitionssprache.
Befehle der Datendefinitionssprache
Dieser Abschnitt des Artikels gibt Ihnen eine Vorstellung von den Befehlen, mit deren Hilfe Sie Ihre Datenbank definieren können. Die Befehle lauten wie folgt:
- ERSTELLEN
- LÖSCHEN
- ÄNDERN
- KÜRZEN
- UMBENENNEN
ERSTELLEN
Diese Anweisung wird verwendet, um eine Tabelle, Datenbank oder Ansicht zu erstellen.
Die „CREATE DATABASE“-Anweisung
Diese Anweisung wird verwendet, um eine Datenbank zu erstellen.
Syntax
CREATE DATABASE DatabaseName;
Beispiel
CREATE DATABASE Students;
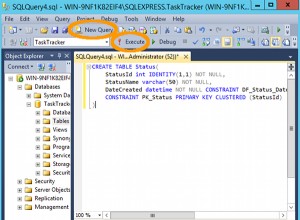
Die 'CREATE TABLE'-Anweisung
Wie der Name schon sagt, wird diese Anweisung verwendet, um eine Tabelle zu erstellen.
Syntax
CREATE TABLE TableName (
Column1 datatype,
Column2 datatype,
Column3 datatype,
....

ColumnN datatype
);
Beispiel
CREATE TABLE StudentInfo
(
StudentID int,
StudentName varchar(8000),
ParentName varchar(8000),
PhoneNumber int,
AddressofStudent varchar(8000),
City varchar(8000),
Country varchar(8000)
);
FALLEN
Diese Anweisung wird verwendet, um eine vorhandene Tabelle, Datenbank oder Ansicht zu löschen.
Die „DROP DATABASE“-Anweisung
Diese Anweisung wird verwendet, um eine vorhandene Datenbank zu löschen. Die gesamten in der Datenbank vorhandenen Informationen gehen verloren, sobald Sie den folgenden Befehl ausführen.
Syntax
DROP DATABASE DatabaseName;
Beispiel
DROP DATABASE Students;
Die 'DROP TABLE'-Anweisung
Diese Anweisung wird verwendet, um eine vorhandene Tabelle zu löschen. Die gesamten in der Tabelle enthaltenen Informationen gehen verloren, sobald Sie den folgenden Befehl ausführen.
Syntax
DROP TABLE TableName;
Beispiel
DROP TABLE StudentInfo;
ÄNDERN
Der ALTER-Befehl wird verwendet, um Spalten oder Einschränkungen in einer bestehenden Tabelle hinzuzufügen, zu löschen oder zu ändern.
Die „ALTER TABLE“-Anweisung
Diese Anweisung wird verwendet, um Spalten in einer bereits bestehenden Tabelle hinzuzufügen, zu löschen oder zu ändern.
Die 'ALTER TABLE'-Anweisung mit ADD/DROP COLUMN
Die ALTER TABLE-Anweisung wird mit dem Befehl ADD/DROP Column verwendet, um eine Spalte hinzuzufügen und zu löschen.
Syntax
ALTER TABLE TableName
ADD ColumnName Datatype;

ALTER TABLE TableName
DROP COLUMN ColumnName;
Beispiel
--ADD Column BloodGroup:
ALTER TABLE StudentInfo
ADD BloodGroup varchar(8000);

--DROP Column BloodGroup:
ALTER TABLE StudentInfo
DROP COLUMN BloodGroup ;
Die 'ALTER TABLE'-Anweisung mit ALTER COLUMN
Die ALTER TABLE-Anweisung kann mit der ALTER-Spalte verwendet werden, um den Datentyp einer vorhandenen Spalte in einer Tabelle zu ändern.
Syntax
ALTER TABLE TableName
ALTER COLUMN ColumnName Datatype;
Beispiel
--Add a column DOB and change the data type from date to datetime.
ALTER TABLE StudentInfo
ADD DOB date;
ALTER TABLE StudentInfo
ALTER COLUMN DOB datetime;
KÜRZEN
Dieser SQL-Befehl wird verwendet, um die in der Tabelle vorhandenen Informationen zu löschen, löscht jedoch nicht die Tabelle selbst. Wenn Sie also die in der Tabelle vorhandenen Informationen und nicht die Tabelle selbst löschen möchten, müssen Sie den TRUNCATE-Befehl verwenden. Verwenden Sie andernfalls den DROP-Befehl.
Syntax
TRUNCATE TABLE TableName;
Beispiel
TRUNCATE TABLE StudentInfo;
UMBENENNEN
Diese Anweisung wird verwendet, um eine oder mehrere Tabellen umzubenennen.
Syntax
sp_rename 'OldTableName', 'NewTableName';
Beispiel
sp_rename 'StudentInfo', 'Infostudents';
Fahren Sie mit diesem Artikel zum SQL Server-Tutorial fort und lassen Sie uns die verschiedenen Datentypen verstehen, die von SQL Server unterstützt werden.
SQL Server-Datentypen
| Datentypkategorie | Name des Datentyps | Beschreibung | Bereich/Syntax |
| Exakte Zahlen | numerisch | Wird verwendet, um numerische Werte zu speichern und hat eine feste Genauigkeit und Skalierungszahlen | – 10^38 +1 bis 10^38 – 1. |
| tinyint | Wird verwendet, um ganzzahlige Werte zu speichern | 0 bis 255 | |
| smallint | Wird verwendet, um ganzzahlige Werte zu speichern | -2^15 (-32.768) bis 2^15-1 (32.767) | |
| bigint | Wird verwendet, um ganzzahlige Werte zu speichern | -2^63 (-9.223.372.036.854.775.808) bis 2^63-1 (9.223.372.036.854.775.807) | |
| int | Wird verwendet, um ganzzahlige Werte zu speichern | -2^31 (-2.147.483.648) bis 2^31-1 (2.147.483.647) | |
| Bit | Speichert einen ganzzahligen Datentyp, der einen Wert von 0, 1 oder NULL hat | 0, 1 oder NULL | |
| dezimal | Wird verwendet, um numerische Werte zu speichern und hat eine feste Genauigkeit und Skalierungszahlen | – 10^38 +1 bis 10^38 – 1. | |
| smallmoney | Wird verwendet, um Geld- oder Währungswerte zu speichern. | – 214.748,3648 bis 214.748,3647 | |
| Geld | Wird verwendet, um Geld- oder Währungswerte zu speichern. | -922.337.203.685.477,5808 bis 922.337.203.685.477,5807 (-922.337.203.685.477,58 bis 922.337.203.685.477,58 für Informatica. | |
| Ungefähre Zahlen | float | Wird verwendet, um numerische Fließkommadaten zu speichern | – 1,79E+308 bis -2,23E-308, 0 und 2,23E-308 bis 1,79E+308 |
| real | Wird verwendet, um numerische Fließkommadaten zu speichern | – 3,40E + 38 bis -1,18E – 38, 0 und 1,18E – 38 bis 3,40E + 38 | |
| Datum und Uhrzeit | date | Wird verwendet, um ein Datum in SQL Server zu definieren. | Syntax:Datum |
| smalldatetime | Wird verwendet, um ein Datum zu definieren, das mit einer Tageszeit kombiniert wird; wobei die Zeit auf einem 24-Stunden-Tag basiert, mit Sekunden immer Null (:00) und ohne Sekundenbruchteile. | Syntax:smalldatetime | |
| datetime | Wird verwendet, um ein Datum zu definieren, das mit einer Tageszeit mit Sekundenbruchteilen basierend auf einer 24-Stunden-Uhr kombiniert wird. | Syntax:datetime | |
| datetime2 | datetime2 ist eine Erweiterung des bestehenden datetime Typ, der eine größere standardmäßige gebrochene Genauigkeit, größten Datumsbereich hat. | Syntax:datetime2 | |
| datetimeoffset | Wird verwendet, um ein Datum zu definieren, das mit einer Tageszeit kombiniert wird, die eine Zeitzonenerkennung hat. Es basiert auf einer 24-Stunden-Uhr. | Syntax:datetimeoffset | |
| Zeit | Wird verwendet, um eine Tageszeit zu definieren. | Syntax:Zeit | |
| Zeichenfolgen | Zeichen | Wird verwendet, um Zeichen mit fester Größe zu speichern. | char [ ( n ) ] wobei der n-Wert zwischen 1 und 8.000 variiert |
| varchar | Wird verwendet, um Zeichen mit variabler Länge zu speichern. | varchar [ ( n | max ) ], wobei der n-Wert zwischen 1 und 8000 variiert und der maximal zulässige Speicherplatz 2 GB beträgt. | |
| Text | Wird verwendet, um Nicht-Unicode-Daten variabler Länge zu speichern | Maximal zulässige Zeichenfolgenlänge – 2^31-1 (2.147.483.647) | |
| Unicode-Zeichenfolgen | nchar | Wird verwendet, um Zeichen mit fester Größe zu speichern. | nchar [ ( n ) ] wobei der n-Wert zwischen 1 und 4000 variiert |
| nvarchar | Wird verwendet, um Zeichen mit variabler Länge zu speichern. | varchar [ ( n | max ) ], wobei der n-Wert zwischen 1 und 4000 variiert und der maximal zulässige Speicherplatz 2 GB beträgt. | |
| ntext | Wird verwendet, um Unicode-Daten variabler Länge zu speichern | Maximal zulässige Zeichenfolgenlänge – 2^30-1 (2.147.483.647) | |
| Binäre Zeichenfolgen | binär | Wird verwendet, um binäre Datentypen mit fester Länge zu speichern | binär [ ( n ) ] wobei der n-Wert zwischen 1 und 8.000 variiert |
| varbinary | Wird verwendet, um binäre Datentypen mit fester Länge zu speichern | varbinary [ ( n ) ] wobei der Wert n von 1-8000 variiert und der maximal zulässige Speicherplatz 2^31-1 Bytes beträgt. | |
| Bild | Wird verwendet, um Binärdaten variabler Länge zu speichern | 0 – 2^31-1 (2.147.483.647) Bytes | |
| Andere Datentypen | Cursor | Es ist ein Datentyp für gespeicherte Prozeduren oder Variablen-OUTPUT-Parameter, die einen Verweis auf einen Cursor enthalten. | – |
| rowversion | Wird verwendet, um automatisch generierte, eindeutige Binärzahlen innerhalb einer Datenbank anzuzeigen. | – | |
| hierarchyid | Wird verwendet, um die Position in einer Hierarchie darzustellen. | – | |
| eindeutige Kennung | Ist eine 16-Byte-GUID. | Syntax:uniqueidentifier | |
| sql_variant | Wird verwendet, um die Werte verschiedener von SQL Server unterstützter Datentypen zu speichern | Syntax:sql_variant | |
| xml | Wird zum Speichern des XML-Datentyps verwendet. | xml ( [ INHALT | DOKUMENT ] xml_schemacollection ) | |
| Räumliche Geometrietypen | Wird verwendet, um Daten in einem euklidischen (flachen) Koordinatensystem darzustellen. | – | |
| Räumliche Geografietypen | Zum Speichern von Ellipsoid-Daten (runde Erde) wie GPS-Breiten- und -Längenkoordinaten verwendet. | – | |
| Tabelle | Wird verwendet, um eine Ergebnismenge zur späteren Verarbeitung zu speichern | – |
Lassen Sie uns als Nächstes in diesem Artikel die verschiedenen Arten von Schlüsseln und Einschränkungen in der Datenbank verstehen.
Verschiedene Arten von Schlüsseln in der Datenbank
The following are the different types of keys used in database:
- Candidate Key – Candidate Key is a set of attributes that can uniquely identify a table. A table can have more than a single candidate key, and out of the chosen candidate keys, one key is chosen as the Primary Key.
- Super Key – The set of attributes can uniquely identify a tuple. So, candidate keys, unique keys, and primary keys are super keys, but the vice-versa isn’t true.
- Primary Key – Primary keys are used to uniquely identify every tuple.
- Alternate Key – Alternate Keys are those candidate keys that are not chosen as a Primary key.
- Unique Key – Unique keys are similar to the primary key, but allow a single NULL value in the column.
- Foreign Key – An attribute that can only take the values present as the values of some other attribute, is the foreign key to the attribute to which it refers.
- Composite Key – Composite keys are a combination of two or more columns that identify each tuple uniquely.
Constraints Used In Database
Constraints are used in a database to specify the rules for data stored in a table. The different types of constraints in SQL are as follows:
- NOT NULL
- UNIQUE
- CHECK
- DEFAULT
- INDEX
NOT NULL
The NOT NULL constraint ensures that a column cannot have a NULL value.
Example
CREATE TABLE StudentsInfo
(
StudentID int NOT NULL,
StudentName varchar(8000) NOT NULL,
ParentName varchar(8000),
PhoneNumber int ,
AddressofStudent varchar(8000) NOT NULL,
City varchar(8000),
Country varchar(8000)
);

--NOT NULL on ALTER TABLE
ALTER TABLE StudentsInfo
ALTER COLUMN PhoneNumber int NOT NULL;
UNIQUE
This constraint ensures that all the values in a column are unique.
Example
--UNIQUE on Create Table

CREATE TABLE StudentsInfo
(
StudentID int NOT NULL UNIQUE,
StudentName varchar(8000) NOT NULL,
ParentName varchar(8000),
PhoneNumber int ,
AddressofStudent varchar(8000) NOT NULL,
City varchar(8000),
Country varchar(8000)
);

--UNIQUE on Multiple Columns

CREATE TABLE StudentsInfo
(
StudentID int NOT NULL,
StudentName varchar(8000) NOT NULL,
ParentName varchar(8000),
PhoneNumber int ,
AddressofStudent varchar(8000) NOT NULL,
City varchar(8000),
Country varchar(8000)
CONSTRAINT UC_Student_Info UNIQUE(StudentID, PhoneNumber)
);

--UNIQUE on ALTER TABLE

ALTER TABLE StudentsInfo
ADD UNIQUE (StudentID);

--To drop a UNIQUE constraint

ALTER TABLE  StudentsInfo
DROP CONSTRAINT UC_Student_Info;
CHECK
The CHECK constraint ensures that all the values in a column satisfy a specific condition.
Example
--CHECK Constraint on CREATE TABLE

CREATE TABLE StudentsInfo
(
StudentID int NOT NULL,
StudentName varchar(8000) NOT NULL,
ParentName varchar(8000),
PhoneNumber int ,
AddressofStudent varchar(8000) NOT NULL,
City varchar(8000),
Country varchar(8000) CHECK (Country ='India')
);

--CHECK Constraint on multiple columns

CREATE TABLE StudentsInfo
(
StudentID int NOT NULL,
StudentName varchar8000) NOT NULL,
ParentName varchar(8000),
PhoneNumber int ,
AddressofStudent varchar(8000) NOT NULL,
City varchar(8000),
Country varchar(8000) CHECK (Country ='India'  AND City = 'Hyderabad')
);

--CHECK Constraint on ALTER TABLE

ALTER TABLE StudentsInfo
ADD CHECK (Country ='India');

--To give a name to the CHECK Constraint

ALTER TABLE StudentsInfo
ADD CONSTRAINT CheckConstraintName CHECK (Country ='India');

--To drop a CHECK Constraint

ALTER TABLE StudentsInfo
DROP CONSTRAINT CheckConstraintName;
DEFAULT
The DEFAULT constraint consists of a set of default values for a column when no value is specified.
Example
--DEFAULT Constraint on CREATE TABLE

CREATE TABLE StudentsInfo
(
StudentID int,
StudentName varchar(8000) NOT NULL,
ParentName varchar(8000),
PhoneNumber int ,
AddressofStudent varchar(8000) NOT NULL,
City varchar(8000),
Country varchar(8000) DEFAULT 'India'
);

--DEFAULT Constraint on ALTER TABLE

ALTER TABLE StudentsInfo
ADD CONSTRAINT defau_Country
DEFAULT 'India' FOR Country;

--To drop the Default Constraint

ALTER TABLE StudentsInfo
ALTER COLUMN Country DROP defau_Country;
INDEX
The INDEX constraint is used to create indexes in the table, through which you can create and retrieve data from the database very quickly.
Syntax
--Create an Index where duplicate values are allowed
CREATE INDEX IndexName
ON TableName (Column1, Column2, ...ColumnN);

--Create an Index where duplicate values are not allowed
CREATE UNIQUE INDEX IndexName
ON TableName (Column1, Column2, ...ColumnN);
Example
CREATE INDEX idex_StudentName
ON StudentsInfo (StudentName);

--To delete an index in a table
 DROP INDEX StudentsInfo.idex_StudentName;
Moving forward in this article on SQL Server tutorial, let us now understand the different Data Manipulation Language commands used in Microsoft SQL Server.
Data Manipulation Language commands
This section of the article will cover all those commands through which you can manipulate the database. The commands are as follows:
- USE
- INSERT INTO
- UPDATE
- DELETE
- MERGE
- SELECT
- CUBE
- ROLLUP
- OFFSET
- FETCH
- TOP
- PIVOT
Apart from these commands, there are also other manipulative operators/functions such as:
- Operators
- Arithmetic Operators
- Assignment Operators
- Bitwise Operators
- Comparison Operators
- Compound Operators
- Logical Operators
- Scope Resolution Operators
- Set Operators
- String Concatenation Operators
- Aggregate Functions
- User-Defined Functions
USE
This statement is used to select the database to start performing various operations on it.
Syntax
USE DatabaseName;
Example
USE Students;
INSERT INTO
The INSERT INTO statement is used to insert new records into an existing table.
Syntax
INSERT INTO TableName (Column1, Column2, Column3, ...,ColumnN)
VALUES (value1, value2, value3, ...);

--If you don't want to mention the column names then use the below syntax

INSERT INTO TableName
VALUES (Value1, Value2, Value3, ...);
Example
INSERT INTO StudentsInfo(StudentID, StudentName, ParentName, PhoneNumber, AddressofStudent, City, Country)
VALUES ('06', 'Sanjana','Kapoor', '9977331199', 'Buffalo Street House No 10', 'Kolkata', 'India');

INSERT INTO StudentsInfo
VALUES ('07', 'Vishal','Mishra', '9876509712', 'Nice Road 15', 'Pune', 'India');
UPDATE
The UPDATE statement is used to modify or update the records already present in the table.
Syntax
UPDATE TableName
SET Column1 = Value1, Column2 = Value2, ...
WHERE Condition;
Example
UPDATE StudentsInfo
SET StudentName = 'Aahana', City= 'Ahmedabad'
WHERE StudentID = 1;
DELETE
The DELETE statement is used to delete the existing records in a table.
Syntax
DELETE FROM TableName WHERE Condition;
Example
DELETE FROM StudentsInfo
WHERE StudentName='Aahana';
MERGE
The MERGE statement is used to perform the INSERT, UPDATE and DELETE operations on a specific table, where the source table is provided. Refer below.
Syntax
MERGE TagretTableName USING SourceTableName
ON MergeCondition
WHEN MATCHED
THEN Update_Statement
WHEN NOT MATCHED
THEN Insert_Statement
WHEN NOT MATCHED BY SOURCE
THEN DELETE;
Example
To understand the MERGE statement, consider the following tables as the Source table and the Target table.
Source Table:
| StudentID | StudentName | Marks |
| 1 | Vihaan | 87 |
| 2 | Manasa | 92 |
| 4 | Anay | 74 |
Target Table:
| StudentID | StudentName | Marks |
| 1 | Vihaan | 87 |
| 2 | Manasa | 67 |
| 3 | Saurabh | 55 |
MERGE SampleTargetTable TARGET USING SampleSourceTable SOURCE ON (TARGET.StudentID = SOURCE.StudentID)
WHEN MATCHED AND TARGET.StudentName <> SOURCE.StudentName OR TARGET.Marks <> SOURCE.Marks
THEN UPDATE SET TARGET.StudentName = SOURCE.StudentName, TARGET.Marks = SOURCE.Marks
WHEN NOT MATCHED BY TARGET THEN
INSERT (StudentID,StudentName,Marks) VALUES (SOURCE.StudentID,SOURCE.StudentName,SOURCE.Marks)
WHEN NOT MATCHED BY SOURCE THEN
DELETE;
Output
| StudentID | StudentName | Marks |
| 1 | Vihaan | 87 |
| 2 | Manasa | 92 |
| 4 | Anay | 74 |
SELECT
The SELECT statement is used to select data from a database, table or view. The data returned is stored in a result table, called the result-set .
Syntax
SELECT Column1, Column2, ...ColumN
FROM TableName;

--(*) is used to select all from the table
SELECT * FROM table_name;

-- To select the number of records to return use:
SELECT TOP 3 * FROM TableName;
Example
-- To select few columns
SELECT StudentID, StudentName
FROM StudentsInfo;

--(*) is used to select all from the table
SELECT * FROM StudentsInfo;

-- To select the number of records to return use:
SELECT TOP 3 * FROM StudentsInfo;
We can also use the following keywords with the SELECT statement:
- DISTINCT
- ORDER BY
- GROUP BY
- GROUPING SETS
- HAVING Clause
- INTO
DISTINCT
The DISTINCT keyword is used with the SELECT statement to return only different values.
Syntax
SELECT DISTINCT Column1, Column2, ...ColumnN
FROM TableName;
Example
SELECT DISTINCT PhoneNumber FROM StudentsInfo;
ORDER BY
This statement is used to sort the required results either in the ascending or descending order. By default, the results are stored in ascending order. Yet, if you wish to get the results in descending order, you have to use the DESC keyword.
Syntax
SELECT Column1, Column2, ...ColumnN
FROM TableName
ORDER BY Column1, Column2, ... ASC|DESC;
Example
-- Select all students from the 'StudentsInfo' table sorted by ParentName:
SELECT * FROM StudentsInfo
ORDER BY ParentName;

-- Select all students from the 'StudentsInfo' table sorted by ParentName in Descending order:
SELECT * FROM StudentsInfo
ORDER BY ParentName DESC;

-- Select all students from the 'StudentsInfo' table sorted by ParentName and StudentName:
SELECT * FROM StudentsInfo
ORDER BY ParentName, StudentName;

/* Select all students from the 'StudentsInfo' table sorted by ParentName
in Descending order and StudentName in Ascending order: */
SELECT * FROM StudentsInfo
ORDER BY ParentName ASC, StudentName DESC;
GROUP BY
This statement is used with the aggregate functions to group the result-set by one or more columns.
Syntax
SELECT Column1, Column2,..., ColumnN
FROM TableName
WHERE Condition
GROUP BY ColumnName(s)
ORDER BY ColumnName(s);
Example
-- To list the number of students from each city.
SELECT COUNT(StudentID), City
FROM StudentsInfo
GROUP BY City;
GROUPING SETS
GROUPING SETS were introduced in SQL Server 2008, used to generate a result-set that can be generated by a UNION ALL of the multiple simple GROUP BY clauses.
Syntax
SELECT ColumnNames(s)
FROM TableName
GROUP BY GROUPING SETS(ColumnName(s));
Example
SELECT StudentID, StudentName, COUNT(City)
from StudentsInfo
Group BY
GROUPING SETS
((StudentID, StudentName, City),(StudentID),(StudentName),(City));
HAVING
This clause is used in the scenario where the WHERE keyword cannot be used.
Syntax
SELECT ColumnName(s)
FROM TableName
WHERE Condition
GROUP BY ColumnName(s)
HAVING Condition
ORDER BY ColumnName(s);
Example
SELECT COUNT(StudentID), City
FROM StudentsInfo
GROUP BY City
HAVING COUNT(StudentID) > 2
ORDER BY COUNT(StudentID) DESC;
INTO
The INTO keyword can be used with the SELECT statement to copy data from one table to another. Well, you can understand these tables to be temporary tables. The temporary tables are generally used to perform manipulations on data present in the table, without disturbing the original table.
Syntax
SELECT *
INTO NewTable [IN ExternalDB]
FROM OldTable
WHERE Condition;
Example
-- To create a backup of table 'StudentsInfo'
SELECT * INTO StudentsBackup
FROM StudentsInfo;

--To select only few columns from StudentsInfo
SELECT StudentName, PhoneNumber INTO StudentsDetails
FROM StudentsInfo;

SELECT * INTO PuneStudents
FROM StudentsInfo
WHERE City = 'Pune';
CUBE
CUBE is an extension of the GROUP BY clause. It allows you to generate the sub-totals for all the combinations of the grouping columns specified in the GROUP BY clause.
Syntax
SELECT ColumnName(s)
FROM TableName
GROUP BY CUBE(ColumnName1, ColumnName2, ....., ColumnNameN);
Example
SELECT StudentID, COUNT(City)
FROM StudentsInfo
GROUP BY CUBE(StudentID)
ORDER BY StudentID;
ROLLUP
ROLLUP is an extension of the GROUP BY clause. This allows you to include the extra rows which represent the subtotals. These are referred to as super-aggregated rows along with the grand total row.
Syntax
SELECT ColumnName(s)
FROM TableName
GROUP BY ROLLUP(ColumnName1, ColumnName2, ....., ColumnNameN);
Example
SELECT StudentID, COUNT(City)
FROM StudentsInfo
GROUP BY ROLLUP(StudentID);
OFFSET
The OFFSET clause is used with the SELECT and ORDER BY statement to retrieve a range of records. It must be used with the ORDER BY clause since it cannot be used on its own. Also, the range that you mention must be equal to or greater than 0. If you mention a negative value, then it shows an error.
Syntax
SELECT ColumnNames)
FROM TableName
WHERE Condition
ORDER BY ColumnName(s)
OFFSET RowsToSkip ROWS;
Example
Consider a new column Marks in the StudentsInfo table.
SELECT StudentName, ParentName
FROM StudentsInfo
ORDER BY Marks
OFFSET 1 ROWS;
FETCH
The FETCH clause is used to return a set of a number of rows. It has to be used in conjunction with the OFFSET clause.
Syntax
SELECT ColumnNames)
FROM TableName
WHERE Condition
ORDER BY ColumnName(s)
OFFSET RowsToSkip
FETCH NEXT NumberOfRows ROWS ONLY;
Example
SELECT StudentName, ParentName
FROM StudentsInfo
ORDER BY Marks
OFFSET 1 ROWS
FETCH  NEXT 1 ROWS ONLY;
TOP
The TOP clause is used with the SELECT statement to mention the number of records to return.
Syntax
SELECT TOP Number ColumnName(s)
FROM TableName
WHERE Condition;
Example
SELECT TOP 3 * FROM StudentsInfo;
PIVOT
PIVOT is used to rotate the rows to column values and runs aggregations when required on the remaining column values.
Syntax
SELECT NonPivoted ColumnName,
    [First Pivoted ColumnName] AS ColumnName,
    [Second Pivoted ColumnName] AS ColumnName,
    [Third Pivoted ColumnName] AS ColumnName,
    ...
    [Last Pivoted ColumnName] AS ColumnName
FROM
    (SELECT query which produces the data)
    AS [alias for the initial query]
PIVOT
(
    [AggregationFunction](ColumName)
FOR
[ColumnName of the column whose values will become column headers]
    IN ( [First Pivoted ColumnName], [Second Pivoted ColumnName],  [Third Pivoted ColumnName]
    ... [last pivoted column])
) AS [alias for the Pivot Table];
Example
To get a detailed example, you can refer to my article on SQL PIVOT and UNPIVOT. Next in this SQL Server Tutorial let us look into the different operators supported by Microsoft SQL Server.
Operators
The different types of operators supported by SQL Server are as follows:
- Arithmetic Operators
- Assignment Operators
- Bitwise Operators
- Comparison Operators
- Compound Operators
- Logical Operators
- Scope Resolution Operators
- Set Operators
- String Concatenation Operators
Let us discuss each one of them one by one.
Arithmetic Operators
| Operator | Meaning | Syntax |
+ | Addition | expression + expression |
– | Subtraction | expression – expression |
* | Multiplication | expression * expression |
/ | Divison | expression / expression |
% | Modulous | expression % expression |
Assignment Operators
| Operator | Meaning | Syntax |
= | Assign a value to a variable | variable =‘value’ |
Bitwise Operators
| Operator | Meaning | Syntax |
&(Bitwise AND) | Used to perform a bitwise logical AND operation between two integer values. | expression &expression |
&=(Bitwise AND Assignment) | Used to perform a bitwise logical AND operation between two integer values. It also sets a value to the output of the operation. | expression &=expression |
| (Bitwise OR) | Used to perform a bitwise logical OR operation between two integer values as translated to binary expressions within Transact-SQL statements. | expression | expression |
|=(Bitwise OR Assignment) | Used to perform a bitwise logical OR operation between two integer values as translated to binary expressions within Transact-SQL statements. It also sets a value to the output of the operation. | expression |=expression |
^ (Bitwise Exclusive OR) | Used to perform a bitwise exclusive OR operation between two integer values. | expression ^ expression |
^=(Bitwise Exclusive OR Assignment) | Used to perform a bitwise exclusive OR operation between two integer values. It also sets a value to the output of the operation. | expression ^=expression |
~ (Bitwise NOT) | Used to perform a bitwise logical NOT operation on an integer value. | ~ expression |
Comparison Operators
| Operator | Meaning | Syntax |
= | Equal to | expression =expression |
> | Greater than | expression> expression |
< | Less than | expression |
>= | Greater than or equal to | expression>=expression |
<= | Less than or equal to | expression <=expression |
<> | Not equal to | expression <> expression |
!= | Not equal to | expression !=expression |
!< | Not less than | expression ! |
!> | Not greater than | expression !> expression |
Compound Operators
| Operator | Meaning | Syntax |
+ = | Used to add value to the original value and set the original value to the result. | expression +=expression |
-= | Used to subtract a value from the original value and set the original value to the result. | expression -=expression |
*= | Used to multiply value to the original value and set the original value to the result. | expression *=expression |
/= | Used to divide a value from the original value and set the original value to the result. | expression /=expression |
%= | Used to divide a value from the original value and set the original value to the result. | expression %=expression |
&= | Used to perform a bitwise AND operation and set the original value to the result. | expression &=expression |
^= | Used to perform a bitwise exclusive OR operation and set the original value to the result. | expression ^=expression |
|= | Used to perform a bitwise OR operation and set the original value to the result. | expression |=expression |
Logical Operators
| Operator | Meaning | Syntax |
ALL | Returns TRUE if all of set of comparisons are TRUE. | scalar_expression { =| <> | !=|> |>=| !> | <| <=| !<} ALL ( subquery ) |
AND | Returns TRUE if both the expressions are TRUE. | boolean_expression AND boolean_expression |
ANY | Returns TRUE if any one of a set of comparisons are TRUE. | scalar_expression { =| <> | ! =|> |> =| !> | <| <=| ! <} { ANY } ( subquery ) |
BETWEEN | Returns TRUE if an operand is within a range. | sampleexpression [ NOT ] BETWEEN beginexpression AND endexpression |
EXISTS | Returns TRUE if a subquery contains any rows. | EXISTS (sub query) |
IN | Returns TRUE if an operand is equal to one of a list of expressions. | test_expression [ NOT ] IN( subquery | expression [ ,…n ]) |
LIKE | Returns TRUE if an operand matches a pattern. | match_expression [ NOT ] LIKE pattern [ ESCAPE escape_character ] |
NOT | Reverses the value of any boolean operator. | [ NOT ] boolean_expression |
OR | Returns TRUE if either of the boolean expression is TRUE. | boolean_expression OR boolean_expression |
SOME | Returns TRUE if some of a set of comparisons are TRUE. | scalar_expression { =| <> | ! =|> |> =| !> | <| <=| ! <} { SOME} ( subquery ) |
Scope Resolution Operators
| Operator | Meaning | Example |
:: | Provides access to static members of a compound data type. Compound data types are those data types which contain multiple methods and simple data types. Compound data types These include the built-in CLR types and custom SQLCLR User-Defined Types (UDTs). | DECLARE @hid hierarchyid; SELECT @hid =hierarchyid::GetRoot(); PRINT @hid.ToString(); |
Set Operators
There are mainly three set operations:UNION, INTERSECT, MINUS. You can refer to the image below to understand the set operations in SQL. Refer to the below image:
| Operator | Meaning | Syntax |
UNION | The UNION operator is used to combine the result-set of two or more SELECT statements. | SELECT ColumnName(s) FROM Table1 UNION SELECT ColumnName(s )FROM Table2; |
INTERSECT | The INTERSECT clause is used to combine two SELECT statements and return the intersection of the data-sets of both the SELECT statements. | SELECT Column1 , Column2 …. FROM TableName; WHERE Condition INTERSECT SELECT Column1 , Column2 …. FROM TableName; WHERE Condition |
EXCEPT | The EXCEPT operator returns those tuples that are returned by the first SELECT operation, and are not returned by the second SELECT operation. | SELECT ColumnName FROM TableName; EXCEPT SELECT ColumnName FROM TableName; |
String Operators
| Operator | Meaning | Syntax/ Example |
+ (String Concatenation) | Concatenates two or more binary or character strings, columns, or a combination of strings and column names into a single expression | expression+expression |
+=(String Concatenation) | Used to concatenate two strings and sets the string to the result of the operation. | expression+=expression |
% (Wildcard Characters to match) | Used to matches any string of zero or more characters. | Example:‘sample%’ |
[] (Wildcard Characters to match) | Used to match a single character within the specified range or set that is specified between brackets []. | Example:m[n-z]%’ |
[^] (Wildcard Characters to match) | Used to match a single character which is not within the range or set specified between the square brackets. | Example:‘Al[^a]%’ |
_ (Wildcard Characters to match) | Used to match a single character in a string comparison operation | test_expression [ NOT ] IN( subquery | expression [ ,…n ]) |
Aggregate Functions
The different aggregate functions supported by SQL Server are as follows:
| Function | Description | Syntax | Example |
SUM() | Used to return the sum of a group of values. | SELECT SUM(ColumnName) FROM TableName; | SELECT SUM(Marks) FROM StudentsInfo; |
COUNT() | Returns the number of rows either based on a condition, or without a condition. | SELECT COUNT(ColumnName) FROM TableName WHERE Condition; | SELECT COUNT(StudentID) FROM StudentsInfo; |
AVG() | Used to calculate the average value of a numeric column. | SELECT AVG(ColumnName) FROM TableName; | SELECT AVG(Marks) FROM StudentsInfo; |
MIN() | This function returns the minimum value of a column. | SELECT MIN(ColumnName) FROM TableName; | SELECT MIN(Marks) FROM StudentsInfo; |
MAX() | Returns a maximum value of a column. | SELECT MAX(ColumnName) FROM TableName; | SELECT MAX(Marks) FROM StudentsInfo; |
FIRST() | Used to return the first value of the column. | SELECT FIRST(ColumnName) FROM TableName; | SELECT FIRST(Marks) FROM StudentsInfo; |
LAST() | This function returns the last value of the column. | SELECT LAST(ColumnName) FROM TableName; | SELECT LAST(Marks) FROM StudentsInfo; |
User-Defined Functions
Microsoft SQL Server allows the users to create user-defined functions which are routines. These routines accept parameters, can perform simple to complex actions and return the result of that particular action as a value. Here, the value returned can either be a single scalar value or a complete result-set.
You can use user-defined functions to:
- Allow modular programming
- Reduce network traffic
- Allow faster execution of queries
Also, there are different types of user-defined functions you can create. They are:
- Scalar Functions: Used to return a single data value of the type defined in the RETURNS clause.
- Table-Valued Functions: Used to return a table data type.
- System Functions: A variety of system functions are provided by the SQL Server to perform different operations.
Well, apart from the user-defined functions, there is a bunch of in-built functions in SQL Server; which can be used to perform a variety of tasks. Moving on in this article on SQL Server tutorial, let us now understand what are nested queries.
Nested Queries
Nested queries are those queries that have an outer query and inner subquery. So, basically, the subquery is a query which is nested within another query such as SELECT, INSERT, UPDATE or DELETE. Refer to the image below:
Next in this SQL Server tutorial, let us understand the different types of joins in SQL.
Joins
Joins are used to combine tuples from two or more tables, based on a related column between the tables. There are four types of joins:
- INNER JOIN: Returns records that have matching values in both the tables.
- LEFT JOIN: Returns records from the left table, and also those records which satisfy the condition from the right table.
- RIGHT JOIN: Returns records from the right table, and also those records which satisfy the condition from the left table.
- FULL JOIN: Returns records which either have a match in the left or the right table.
Consider the following table along with the StudentsInfo table, to understand the syntax of joins.
| SubjectID | StudentID | SubjectName |
| 10 | 10 | Maths |
| 2 | 11 | Physics |
| 3 | 12 | Chemistry |
INNER JOIN
Syntax
SELECT ColumnName(s)
FROM Table1
INNER JOIN Table2 ON Table1.ColumnName = Table2.ColumnName;
Example
SELECT Subjects.SubjectID, StudentsInfo.StudentName
FROM Subjects
INNER JOIN StudentsInfo ON Subjects.StudentID = StudentsInfo.StudentID;
LEFT JOIN
Syntax
SELECT ColumnName(s)
FROM Table1
LEFT JOIN Table2 ON Table1.ColumnName = Table2.ColumnName;
Example
SELECT StudentsInfo.StudentName, Subjects.SubjectID
FROM StudentsInfo
LEFT JOIN Subjects ON StudentsInfo.SubjectID = Subjects.SubjectID
ORDER BY StudentsInfo.StudentName;
RIGHT JOIN
Syntax
SELECT ColumnName(s)
FROM Table1
RIGHT JOIN Table2 ON Table1.ColumnName = Table2.ColumnName;
Example
SELECT StudentsInfo.StudentName, Subjects.SubjectID
FROM StudentsInfo
RIGHT JOIN Subjects ON StudentsInfo.SubjectID = Subjects.SubjectID
ORDER BY StudentsInfo.StudentName;
FULL JOIN
Syntax
SELECT ColumnName(s)
FROM Table1
FULL OUTER JOIN Table2 ON Table1.ColumnName = Table2.ColumnName;
Example
SELECT StudentsInfo.StudentName, Subjects.SubjectID
FROM StudentsInfo
FULL OUTER JOIN Subjects ON StudentsInfo.SubjectID = Subjects.SubjectID
ORDER BY StudentsInfo.StudentName;
Next, in this article on SQL Server tutorial, let us understand the different types of loops supported by the SQL Server.
Loops
The different control-of-flow commands are as follows:
- BEGIN..END
- BREAK
- CONTINUE
- GOTO
- IF..ELSE
- RETURN
- WAITFOR
- WHILE
Let us discuss each one of them one by one.
BEGIN..END
These keywords are used to enclose a series of SQL statements. Then, this group of SQL statements can be executed.
Syntax
BEGIN
     { SQLStatement | StatementBlock }
END
BREAK
This statement is used to exit the current WHILE loop. In case, the current WHILE loop is nested inside another loop, then the BREAK statement exits only the current loop and the control is passed on to the next statement in the current loop. The BREAK statement is generally used inside an IF statement.
Syntax
BREAK;
CONTINUE
The CONTINUE statement is used to restart a WHILE loop. So, any statements after the CONTINUE keyword will be ignored.
Syntax
CONTINUE;
Here, Label is the point after which processing starts if a GOTO is targeted to that particular label.
GOTO
Used to alter the flow of execution to a label. The statements written after the GOTO keyword are skipped and processing continues at the label.
Syntax
Define Label:
Label:
Alter Execution:
GOTO Label
Here, Label is the point after which processing starts if a GOTO is targeted to that particular label.
IF..ELSE
Like any other programming language, the If-else statement in SQL Server tests the condition and if the condition is false then ‘else’ statement is executed.
Syntax
IF BooleanExpression
     { SQLStatement | StatementBlock }
[ ELSE
     { SQLStatement | StatementBlock } ]
RETURN
Used to exit unconditionally from a query or procedure. So, the statements which are written after the RETURN clause are not executed.
Syntax
RETURN [ IntegerExpression ]
Here, an integer value is returned.
WAITFOR
The WAITFOR control flow is used to block the execution of a stored procedure, transaction or a batch until a specific statement modifies, returns at least one row or a specified time or time interval elapses.
Syntax
WAITFOR
{
    DELAY 'TimeToPass'
  | TIME 'TimeToExecute'
  | [ ( RecieveStatement ) | ( GetConversionGroupStatement ) ]
    [ , TIMEOUT timeout ]
}
where,
- DELAY – Period of time that must pass
- TimeToPass – Period of time to wait
- TIME – The time when the stored procedure, transaction or the batch runs.
- TimeToExecute – The time at which the WAITFOR statement finishes.
- RecieveStatement – A valid RECEIVE statement.
- GetConversionGroupStatement – A valid GET CONVERSATION GROUP statement.
- TIMEOUT timeout – Specifies the period of time, in milliseconds, to wait for a message to arrive on the queue.
WHILE
This loop is used to set a condition for repeated execution of a particular SQL statement or a SQL statement block. The statements are executed as long as the condition mentioned by the user is TRUE. As soon as the condition fails, the loop stops executing.
Syntax
WHILE BooleanExpression
{ SQLStatement | StatementBlock | BREAK | CONTINUE }
Now, that you guys know the DML commands, let’s move onto our next section in this article on SQL Tutorial i.e. the DCL commands.
Data Control Language Commands (DCL)
This section of SQL Server tutorial will give you an idea about the command through which are used to enforce database security in multiple user database environments. The commands are as follows:
- GRANT
- REVOKE
GRANT
The GRANT command is used to provide access or privileges on the database and its objects to the users.
Syntax
GRANT PrivilegeName
ON ObjectName
TO {UserName |PUBLIC |RoleName}
[WITH GRANT OPTION];
where,
- PrivilegeName – Is the privilege/right/access granted to the user.
- ObjectName – Name of a database object like TABLE/VIEW/STORED PROC.
- UserName – Name of the user who is given the access/rights/privileges.
- PUBLIC – To grant access rights to all users.
- RoleName – The name of a set of privileges grouped together.
- WITH GRANT OPTION – To give the user access to grant other users with rights.
Example
-- To grant SELECT permission to StudentsInfo table to user1
GRANT SELECT ON StudentsInfo TO user1;
REVOKE
The REVOKE command is used to withdraw the user’s access privileges given by using the GRANT command.
Syntax
REVOKE PrivilegeName
ON ObjectName
FROM {UserName |PUBLIC |RoleName}
Example
-- To revoke the granted permission from user1
REVOKE SELECT ON StudentsInfo TO user1;
Moving on in this SQL Server tutorial, let us understand the how to create and use Stored Procedures.
Stored Procedures
Stored Procedures are reusable units that encapsulate a specific business logic of the application. So, it is a group of SQL statements and logic, compiled and stored together to perform a specific task.
Syntax
CREATE [ OR REPLACE] PROCEDURE procedure_name [
(parameter_name [IN | OUT | IN OUT] type [ ])]
{IS | AS }
BEGIN [declaration_section]
executable_section
//SQL statement used in the stored procedure
END
GO
Example
--Create a procedure that will return a student name when the StudentId is given as the input parameter to the stored procedure
Create  PROCEDURE GetStudentName
(
@StudentId INT, --Input parameter ,
@StudName VARCHAR(50)  OUT  --Output parameter,
AS
BEGIN
SELECT @StudName = StudentName FROM StudentsInfo WHERE StudentID=@StudentId
END
Steps to execute:
- Declare @StudName as nvarchar(50)
- EXEC GetStudentName 01, @StudName output
- SELECT @StudName
The above procedure returns the name of a particular student, on giving that students id as input. Next in this SQL Server tutorial, let us understand the transaction control language commands.
Transaction Control Language Commands (TCL)
This section of SQL Server tutorial will give you an insight into the commands which are used to manage transactions in the database. The commands are as follows:
- COMMIT
- ROLLBACK
- SAVEPOINT
COMMIT
The COMMIT command is used to save the transaction into the database.
Syntax
COMMIT;
ROLLBACK
The ROLLBACK command is used to restore the database to the last committed state.
Syntax
ROLLBACK;
NOTE: When you use ROLLBACK with SAVEPOINT, then you can directly jump to a savepoint in an ongoing transaction. Syntax:ROLLBACK TO SavepointName;
SAVEPOINT
The SAVEPOINT command is used to temporarily save a transaction. So if you wish to rollback to any point, then you can save that point as a ‘SAVEPOINT’.
Syntax
SAVEPOINT SAVEPOINTNAME;
Consider the below table to understand the working of transactions in the database.
| StudentID | StudentName |
| 1 | Rohit |
| 2 | Suhana |
| 3 | Ashish |
| 4 | Prerna |
Now, use the below SQL queries to understand the transactions in the database.
INSERT INTO StudentTable VALUES(5, 'Avinash');
COMMIT;
UPDATE StudentTable SET name = 'Akash' WHERE id = '5';
SAVEPOINT S1;
INSERT INTO StudentTable VALUES(6, 'Sanjana');
SAVEPOINT S2;
INSERT INTO StudentTable VALUES(7, 'Sanjay');
SAVEPOINT S3;
INSERT INTO StudentTable VALUES(8, 'Veena');
SAVEPOINT S4;
SELECT * FROM StudentTable;
Next in this article on SQL Server tutorial let us understand how to handle exceptions in Transact-SQL.
Exception Handling
There are two types of exceptions, i.e, the system-defined exceptions and the user-defined exceptions. As the name suggests, exception handling is a process through which a user can handle the exceptions generated. To handle exceptions you have to understand the following control flow statements:
- THROW
- TRY…CATCH
THROW
This clause is used to raise an exception and transfers the execution to a CATCH block of a TRY…CATCH construct.
Syntax
THROW [ { ErrorNumber | @localvariable },
        { Message | @localvariable },
        { State | @localvariable } ]
[ ; ]
where,
- ErrorNumber – A constant or variable that represents the exception.
- Message – A variable or string that describes the exception.
- State – A constant or variable between 0 and 255 that indicates the state to associate with the message.
THROW 51000, 'Record does not exist.', 1;
TRY..CATCH
Used to implement exception handling in Transact-SQL. A group of statements can be enclosed in the TRY block. In case an error occurs in the TRY block, control is passed to another group of statements that are enclosed in a CATCH block.
Syntax
BEGIN TRY
     { SQLStatement | StatementBlock}
END TRY
BEGIN CATCH
     [ { SQLStatement | StatementBlock } ]
END CATCH
[ ; ]
BEGIN TRY
    SELECT * FROM StudentsInfo;
END TRY
BEGIN CATCH
    SELECT
        ERROR_NUMBER() AS ErNum , ERROR_MESSAGE() AS ErMsg;
END CATCH
W ith this, we come to the end of this article on SQL Server Tutorial. I hope you enjoyed reading this article on SQL Server Tutorial For Beginners. I f you wish to get a structured training on MySQL, then check out our MySQL DBA Certification Training which comes with instructor-led live training and real-life project experience. This training will help you understand MySQL in-depth and help you achieve mastery over the subject. Got a question for us? Please mention it in the comments section of ”SQL Server Tutorial ” and I will get back to you.