Verwenden Sie im ersten Schritt get cli, um die grundlegende Projektstruktur zu generieren
https://pub.dev/packages/get_cli
get create project:strapi_flutter_internation_poc
  1) Flutter Project
  2) Get Server
1
? What is your company's domain?  Example: com.yourcompany  com.nasawz.strapi_flutter_internation_poc

what language do you want to use on ios?

  1) Swift
  2) Objective-C
1

what language do you want to use on android?

  1) Kotlin
  2) Java
1

Do you want to use null safe?

  1) Yes!
  2) No
1

do you want to use some linter?

  1) no
  2) Pedantic [Deprecated]
  3) Effective Dart [Deprecated]
  4) Dart Recommended
1

Running `flutter create D:\poc\strapi_flutter_internation_poc` …

$ flutter create --no-pub -i swift -a kotlin --org com.nasawz.strapi_flutter_internation_poc D:\poc\strapi_flutter_internation_poc
Creating project ....
  lib\main.dart (created)
  pubspec.yaml (created)
  README.md (created)
  test\widget_test.dart (created)
  .gitignore (created)
  .idea\libraries\Dart_SDK.xml (created)
  .idea\libraries\KotlinJavaRuntime.xml (created)
  .idea\modules.xml (created)
  .idea\runConfigurations\main_dart.xml (created)
  .idea\workspace.xml (created)
  .metadata (created)
 .......
 ........
Wrote 81 files.

All done!
In order to run your application, type:

  $ cd .
  $ flutter run

Your application code is in .\lib\main.dart.


Running `flutter pub get` …

$ flutter pub get
Running "flutter pub get" in strapi_flutter_internation_poc...      2,666ms
$ dart migrate --apply-changes --skip-import-check
Migrating D:\poc\strapi_flutter_internation_poc

See https://dart.dev/go/null-safety-migration for a migration guide.

Analyzing project...
All sources appear to be already migrated.  Nothing to do.
✓  File: analysis_options.yaml created successfully at path: analysis_options.yaml
  1) GetX Pattern (by Kauê)
  2) CLEAN (by Arktekko)
1

Your lib folder is not empty. Are you sure you want to overwrite your application?
 WARNING: This action is irreversible

  1) Yes!
  2) No
1
✓  'Package: get installed!
✓  File: main.dart created successfully at path: lib\\main.dart
✓  File: home_controller.dart created successfully at path: ./lib\app\modules\home\\controllers\\home_controller.dart
✓  File: home_view.dart created successfully at path: ./lib\app\modules\home\\views\\home_view.dart
✓  File: home_binding.dart created successfully at path: ./lib\app\modules\home\\bindings\\home_binding.dart
✓  File: app_routes.dart created successfully at path: lib\\app\\routes\\app_routes.dart
✓  File: app_pages.dart created successfully at path: lib\\app\\routes\\app_pages.dart
✓  home route created successfully.
✓  Home page created successfully.
✓  GetX Pattern structure successfully generated.

Running `flutter pub get` …

$ flutter pub get
Running "flutter pub get" in strapi_flutter_internation_poc...
Bisher haben wir eine Flutter-basierte Projektstruktur.
Lassen Sie uns als Nächstes Strapi in das Projekt integrieren.
Schritt zwei, in Strapi integrieren
https://strapi.io/
Geben Sie das Projektverzeichnis ein
cd .\strapi_flutter_internation_poc
Verwenden Sie "create-strapi-app", um das Projekt zu initialisieren
npx create-strapi-app strapi
npx: installed 146 in 14.856s
? Choose your installation type Quickstart (recommended)
? Would you like to use a template? (Templates are Strapi configurations designed for a specific use case) No
Creating a quickstart project.
Creating a new Strapi application at D:\poc\strapi_flutter_internation_poc\strapi.
Creating files.
Dependencies installed successfully.

Your application was created at D:\poc\strapi_flutter_internation_poc\strapi.

Available commands in your project:

  yarn develop
  Start Strapi in watch mode.

  yarn start
  Start Strapi without watch mode.

  yarn build
  Build Strapi admin panel.

  yarn strapi
  Display all available commands.

You can start by doing:

  cd D:\poc\strapi_flutter_internation_poc\strapi
  yarn develop


> [email protected] build D:\poc\strapi_flutter_internation_poc\strapi
> strapi build "--no-optimization"

Building your admin UI with development configuration ...

√ Webpack
  Compiled successfully in 27.43s

Running your Strapi application.
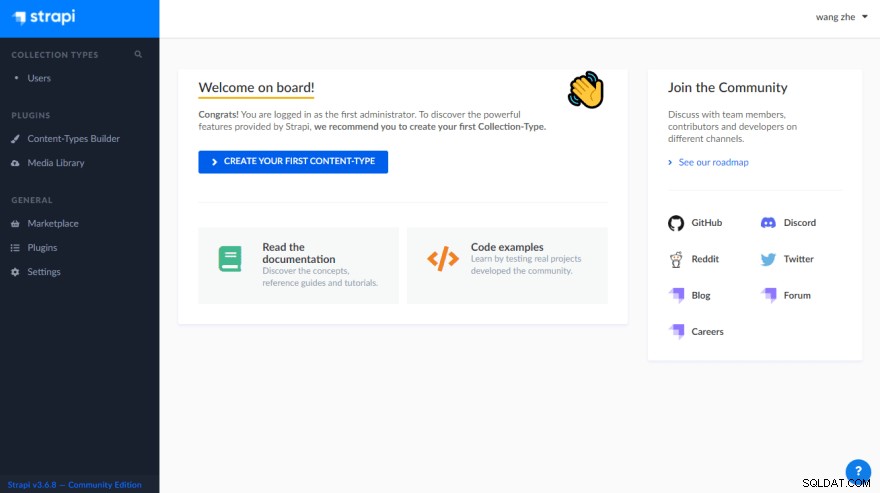
Hier wird Strapi erfolgreich installiert und lokal http://localhost:1337
gestartet

Nachdem Sie diese Schnittstelle sehen können, können Sie sie zuerst anhalten und zuerst die Konfiguration von Strapi ändern. Richten Sie die Adresse der Standard-Sqlite-Datenbank in Strapi auf den Assets-Ordner des Flutter-Projekts.
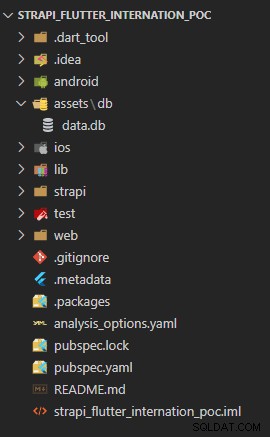
Erstellen Sie zunächst den entsprechenden Ordner assets/db
Bearbeiten Sie [project_root]/strapi/config/database.js
module.exports = ({ env }) => ({
  defaultConnection: 'default',
  connections: {
    default: {
      connector: 'bookshelf',
      settings: {
        client: 'sqlite',
        filename: env('DATABASE_FILENAME', '../assets/db/data.db'),
      },
      options: {
        useNullAsDefault: true,
      },
    },
  },
});
Starten Sie das Strapi-Projekt neu, nachdem die Änderung abgeschlossen ist
npm run develop
Registrieren Sie ein Administratorkonto
[email protected]
nrVABVAAYq9geTY
Ändern Sie die Konfigurationsdatei pubspec.yaml des Flutter-Projekts und trage den Pfad der Datenbank unter Assets ein
flutter:
  assets:
    - assets/db/
  uses-material-design: true
In nachfolgenden Entwicklungen kann Flutter die Datenbankdateien von Strapi verwenden.
Sehen Sie sich nun die unten gezeigte Projektstruktur an
